They're good for your eyes!

And if you can't tell there's something different about this particular root vegetable, you should get them examined! [Your eyes, not the carrot.]

They're good for your eyes!
And if you can't tell there's something different about this particular root vegetable, you should get them examined! [Your eyes, not the carrot.]
Mmm, garden fresh.

Pea Pod

Using US #4 straight needles and light green yarn…
Row 1: CO1.
Row 2: Kfb
Row 3: K1, m1, k1
Rows 4, 6, 8, and 10: P
Row 5: K1, m1, k1, m1, k1
Row 7: K1, m1, k3, m1, k1
Row 9: K1, m1, k5, m1, k1
Row 11: K1, m1, k7, m1, kn1
Rows 12 – 22: St st, ending on a P row
Row 23: K2tog, k7, ssk
Rows 24, 26, and 28: P
Row 25: K2tog, k5, ssk
Row 27: K2tog, k3, ssk
Row 29: K2tog, k1, ssk
Row 30: P2tog, p1
Row 31: K2tog
Draw yarn through remaining stitch to secure.
Peas (Make 2)
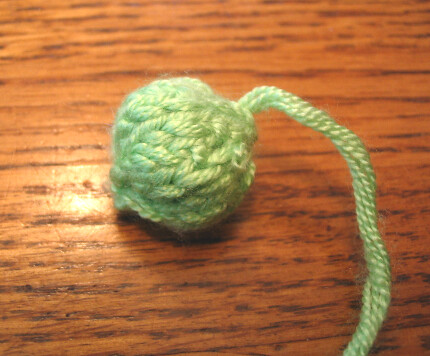
With the same yarn but switching now to US #4 DPN’s…
Row 1: C03, distributing stitches evenly between the needles
Rows 2 and 3: Kfb of each stitch
Row 4: [K1, kfb], repeat 6 times
Rows 5 and 6: K
You will probably want to try adding the stuffing at this stage. It can be very hard to keep in your little pea as you continue to knit and may even jump out a few times, but just wad up a tiny little marble-sized piece of batting very tightly and hold it in there as best you can.
Row 7: [K1, k2tog], repeat 6 times
Row 8: K2tog
Row 9: K2tog
Draw remaining stitches together with the excess yarn and pull tight. Tie off.
Assembly
With the WS facing up, lay out your pea pod and figure out the approximate position of the peas. Fairly simply, take one pea out and sew the other in securely, then putting the second pea back in and sewing it in turn. To keep the piece more stable, it might help you to make just a small stitch or two between the peas so that they stay together. [Alternately, you could experiment with using Velcro or something and making the peas removable…? If anyone tries this, tell me how it goes!]
Take the ends of the pod now and cinch them together. Sew them so that the peas are comfortably nestled in the center and the ends are slightly pointed. Pulled only somewhat tightly, it should not curl anymore despite being knit in st st. Hide ends inside pod, and make a nice green salad!
Weekend boredom can make you knit the strangest things…

Really, just a tiny little nothing, but to my knowledge there are no other knit peas in a pod out there yet, so I was just filling in the gaps, right? It's only about as long as my index finger or so, and working with those tiny DPNs was a bit of a pain, but talk about fast! I had the whole pattern written in a matter of hours!
So, for anyone craving their own crazy little peapod, [Sans the goofy expressions, of course] the pattern will be coming some time a little later in the week, so that I can smooth out the wording a bit and hopefully make it comprehensive!
At long last, you can enjoy your very own slice of knit pizza!

Now, this is my very first pattern, so if there are any errors or confusing bits, please let me know and I’ll do my best to clarify. In addition, I would appreciate it greatly if you would only make these for yourself and your friends, without selling the finished product or pattern, seeing as it came from the vapid expanses of my own head. …So what are you waiting for, get knitting!

With US #7 needles and tan yarn, CO 20
Row 1 and all other odd-numbered rows, unless otherwise noted: P
Row 2 and 4: K1, kfb, k all stitches until last 2, kfb, k1
Row 6 and 8: K
Row 10 and 12: K1, k2tog, k all stitches until last 3, ssk, k1
Row 14 and 16: K
Row 18: K1, k2tog, k all stitches until last 3, ssk, k1
Row 20: K
Row 22: K1, k2tog, k all stitches until last 3, ssk, k1
Row 24 and 26: K
Row 28: K1, k2tog, k all stitches until last 3, ssk, k1
Row 30: K
Row 32: K1, k2tog, k all stitches until last 3, ssk, k1
Row 34: K
Row 36: K1, k2tog, k all stitches until last 3, ssk, k1
Row 38: K
Row 40 and 42: K1, k2tog, k all stitches until last 3, ssk, k1
Row 44: K1, k2tog, ssk, k1
Row 46: K1, k2tog, k1
Row 47: K3tog, Tie off.
To make up the crust, fold over the top of the triangle you just knit, aligning sides so that the increases and decreases match. Hand-sew this flap down, WS facing (the bottom of your pizza will have the smooth side of the stockinet stitch, and all of the bumpy side will eventually be covered by the other pieces.)

To achieve the correct coloration, please refer to the color chart below for the first four rows, continuing in yellow after it is completed.

CO 20
Row 1, and all other odd rows, unless otherwise noted: P
Row 2: K
Row 4: K1, k2tog, k all stitches until last 3, ssk, k1
Row 6: K
Row 8: K1, k2tog, k all stitches until last 3, ssk, k1
Row 10 and 12: K
Row 14: K1, k2tog, k all stitches until last 3, ssk, k1
Row 16: K
Row 18: K1, k2tog, k all stitches until last 3, ssk, k1
Row 20: K
Row 22: K1, k2tog, k all stitches until last 3, ssk, k1
Row 24: K
Row 26 and 28: K1, k2tog, k all stitches until last 3, ssk, k1
Row 30: K
Row 32: K1, k2tog, ssk, k1
Row 34: K1, k2tog, k1
Row 35: K3tog, Tie off.

Switching over to US #4 needles for the toppings, in a light cream yarn, CO 2
Row 1 and all other odd rows: P
Row 2: K
Row 4: Kfb, kfb
Row 6: Kfb, k2, kfb
Row 8: K
Row 10: P2tog, p2, p2tog
BO
With darker brown yarn, hand-embroider the details of the bottom of the mushroom cap, referring to the photo if necessary.
In white yarn, CO 16
Row 1: K2tog across
BO
*For alternate toppings, the technique for the onion can easily make peppers, using either green or red yarn instead of the white.
To assemble: First, weave in ends on all the toppings and sew them securely to the cheese piece in whatever arrangement pleases you. Then smooth out the sides of the sauce / cheese piece (the edges will want to curl, as with any piece knit in stockinet) and align the sides evenly with that of your crust. With WS together, (both RS’s should be outwards and visible) whip stitch the edges together with the crust color, and be sure to also sew down the top part near the folded edge of the crust. Tie tight, and hide the ends underneath the cheese.

Enjoy, but don’t eat!
*Or, go share a slice and see the pizza that other crafty bloggers knit up at…
I’m not sure what the rule is with double-dipping when it comes to knit cookies…

But I say you should just go for it! This sweet little Oreo, Newman O, or what-have-you, is so brainless to whip up, I don’t even remember how long it took me to complete. Knit entirely in garter stitch, I can’t imagine it too much over 1 hour. Trying to photograph it, I had so much fun, I took about 10 individual pictures that I wish I could use here… But I figured that would kinda be overkill.
See for yourself, these sandwich-creme cookies are irresistible, and you can find a fantastically detailed tutorial on Craftster.com, complete with pictures and diagrams of almost every step.

So pour yourself a tall glass of frothy soymilk, and get knitting!
I’ve been experimenting with making my own patterns again…

…And so I’ve come up with this, mushroom / onion pizza! I’m still not entirely satisfied with the look of the mushrooms, but I think it works overall… My nutritionist hinted that knit pizza would be awesome in her office, and since she’s getting married in two weeks and will be off the job for some time, I wanted her last gift from me to be extra special. I’m really happy for her, she’s such a wonderfully kind person and deserves someone who agrees to the millionth degree.
Anyways, if there’s any interest out there, I could write up the instructions for the pizza pattern sometime later this week… Any takers?