Happy Hour with the Daring Bakers

Nostalgia seems to drive many cooks to recreate “classic” recipes, testing them against hazy memories in hopes of discovering something just as good, or better yet, even more delicious than the original. Entering into this month’s Daring Baker challenge, I had the sense that many of my fellow bakers had this exact mission in mind, whether the resulting comparisons would be intentional or not. However, having long since forgotten my last experience of eating a Milano cookie perhaps a decade ago, and never having shared the company of a Mallomar at all, it was a whole new arena for me, and I was very excited about that. Without wistful recollections to weigh me down and close my mind off to new ideas, the potential for innovation that each cookie held was more tempting than the promise of a sweet treat alone. Despite rushing off to Paris and a number of deadline crunches, there was just no way I would miss this challenge.

The July Daring Bakers’ challenge was hosted by Nicole at Sweet Tooth. She chose Chocolate Covered Marshmallow Cookies and Milan Cookies from pastry chef Gale Gand of the Food Network.

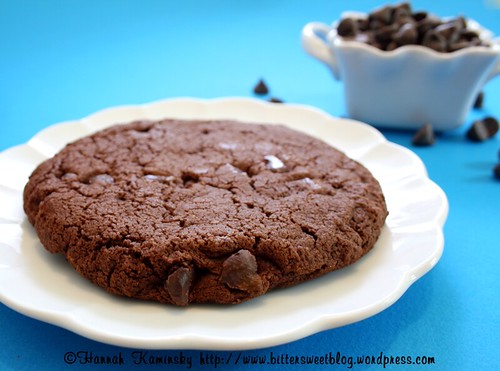
Where, oh where to start? Hemming and hawing over various shapes, presentations, and tastes, I finally settled on a simpler approach and focused on adding fresh flavors to these otherwise uninspiring chocolate-and-vanilla childhood staples. With the terrible heat and unquenchable thirst that it brings, the refreshing zest of a few summery drinks sounded like the perfect place to start.

And it wasn’t just a liquid fix I was craving! Fresh lime zest and mint straight from the garden made their way into the raw batter, giving the crisp cookies a delightful zip. Infusing the ganache of my Milano look-alikes with a healthy splash of rum was what really pulled the treat together though, creating irresistible mojito milans.

The real challenge, as one may have guessed, was creating a vegan marshmallow for the mallomars. Luckily, I had been experimenting recently on just that fluffy confection in question, so I had a pretty good grasp of it from the start. Although my mallow was a bit too soft in the end, all was not lost- into the hemisphere mold it went, and a long stay in the freezer fixed the situation.

This time around, my base cookies were imbued with the zest of an orange, and all of the plain water in my mallows was replaced with champagne. A quick dip in some dark chocolate, and voila- Mimosa mallomars! Both a refined, mature treat that’s still fun and a bit whimsical at the same time.

Time was not on my side, and I didn’t manage to squeeze in the complicated plating originally planned for these lovely mallomars, but at least this was something. Dipping one of the extra cookies half way in chocolate, and then topping that with a big scoop of chocolate ice cream, it was a pleasing, if not impressive, dessert all together. Really, it didn’t need a single thing to make it any more special though, as the mallow is an all-day recipe, making it a rare treat indeed.

Alone and unadorned though, both treats were even better when served chilled!

Bringing a Bite of Paris Back Home

Paris.

If anyone can sum up that city in just a few succinct paragraphs, I would be highly suspicious of how much they actually went out and experienced there. Overwhelmed by all of the words that could be said, the myriad of stories that could be told, after a mere 5 1/2 days of total immersion in the capital of France, I found it impossible to pick and choose the right ones at all. 

If you want to know more about the photos I posted, you can now see a few brief descriptions and explanations on Flickr

Speechless, stunned, and yet brimming with inspiration, I was back at work in the kitchen again as soon as we walked through the door.

Suitcases still stuffed, with both dirty laundry and happy memories, the familiar scent of buttery pastries began floating through the air, as if we had never left Paris at all. This time, however, I could actually enjoy those flaky delicacies, instead of solely photographing them.

I’ll be the first to admit that these are no where near as grand as those massive breakfast confections, but for a first try, I was pleasantly surprised by the outcome. Cut into miniature sizes, each croissant was but two bites each, but unarguably rich enough to quell any further hunger.

Despite how intimidating the hundreds of paper-thin layers may seem, croissants are actually quite simple to make; it’s the waiting and repetition that might become a bit trying. Luckily, I found a recipe for “quick” croissants, which can produce fresh, homemade pastries from start to finish in about 3 hours. Adapting it to better suit my American cups and teaspoons, while also easily veganizing it, this is definitely a good starting place for anyone who wants to give croissants a try for themselves.

Yield: Makes 8 Medium or 12 Small Croissants

Basic Vegan Croissants

Basic Vegan Croissants

Buttery, flaky, crisp, and light, there's nothing like a fresh, homemade croissant still warm from the oven. This shortcut technique is much faster than the traditional approach so you can indulge anytime.

Prep Time 45 minutes
Cook Time 20 minutes
Additional Time 2 hours
Total Time 3 hours 5 minutes

Ingredients

Dough:

  • 2 1/4 Cups Bread Flour
  • 1 Teaspoon Active Dry Yeast
  • 1/2 Cup + 2 Teaspoons Water
  • 1 Teaspoon Salt
  • 2 Tablespoons + 2 Teaspoons Granulated Sugar
  • 1 1/2 Tablespoons Melted Vegan Butter

Butter Block:

  • 9 Tablespoons Vegan Butter, Frozen

Instructions

  1. To make the dough, start by combining all of the dry ingredients together in a large bowl until well distributed. Mix everything together and knead until a smooth dough is formed. Let rest in the fridge for 20-30 minutes. Add in the water and melted vegan butter and stir thoroughly to incorporate. Turn the dough out onto a floured surface and kneed by hand for about 10 – 15 minutes, until smooth and elastic. Place in a lightly greased bowl, cover with plastic wrap, and let rest in the refrigerator for about 30 minutes.
  2. While the dough chills, you can go ahead and prepare the butter block.
  3. It helps to start by cutting the frozen vegan butter into sizable chunks and arranging them right next to each other in as even of a rectangle as possible on top of a silicone baking mat or piece of parchment paper. Sandwich the butter between another silicone baking mat or sheet of parchment paper, and using your rolling pin, whack it into submission. You want to flatten the block out to about 1 cm or so high, and try to keep the sides even and rectangular. Allow it to chill in the fridge for 20-30 minutes.
  4. Once properly chilled, roll the dough out into a rectangle about twice as large as your butter block. Place the butter block in the center, diagonal to the sides (not parallel.) Enclose the block like an envelope, bringing the corners of the dough in to meet at the center. Roll the whole thing out gently to a thickness of about 1 cm again, and fold the short sides in by thirds.*
  5. Return it to the fridge so that it can chill for another 20 minutes before proceeding. Don’t be tempted to hasten this time, as the heat from your hands and the rolling pin will make all of the butter melt and run out. It’s essential to keep this dough as cool as possible before it hits the oven!
  6. Roll out the dough into a rectangle yet again, and fold in thirds as before. Chill for the same amount of time, and then repeat this process once more. Chill the dough for 20 more minutes before shaping it.
  7. To shape your croissants, roll the dough out into a rectangle as before, but cut it with a very sharp knife into equal triangles. If you want mini croissants, cut the dough in half lengthwise first, and then cut your triangles. Roll each triangle up, starting at the widest side, and the place each one on a fresh silpat or piece of parchment paper. Once all the croissants are cut and rolled, let them rise in a warm place for about 75 minutes, until nearly doubled in size.
  8. After rising, move the croissants into a preheated 415 degree oven.
  9. As soon as they’re safely inside, reduce the heat to 350 degrees, and do not open the door again until 15 minutes has elapsed. They should be golden brown, but if not, bake for an additional 5 – 10 minutes as necessary. Let cool before enjoying the fruits of your labor!

Notes

*The folding and shaping process is rather difficult to describe in words, so don’t worry if you’re a bit confused. Just check out the very helpful photos over at WikiHow if you need a visual aid.

Recommended Products

Please note that some of the links above are affiliate links, and at no additional cost to you, I will earn a commission if you decide to make a purchase after clicking through the link. I have experience with all of these companies and I recommend them because they are helpful and useful, not because of the small commissions I make if you decide to buy something through my links.

Nutrition Information:

Yield:

12

Serving Size:

1

Amount Per Serving: Calories: 186Total Fat: 10gSaturated Fat: 2gTrans Fat: 2gUnsaturated Fat: 8gCholesterol: 0mgSodium: 177mgCarbohydrates: 20gFiber: 1gSugar: 1gProtein: 3g

All nutritional information presented within this site are intended for informational purposes only. I am not a certified nutritionist and any nutritional information on BitterSweetBlog.com should only be used as a general guideline. This information is provided as a courtesy and there is no guarantee that the information will be completely accurate. Even though I try to provide accurate nutritional information to the best of my ability, these figures should still be considered estimations.


It’s a Set Up!

Ice cream is one of my all-time favorite photography subjects, so I really had a ball putting together my new ebook. The challenge of snapping that perfect shot before your carefully scooped spheres begin melting and pooling on the table just keeps me coming back for more. That, and the fact that the subjects must be quickly consumed once the camera is turned off, make for some great foodie photo fun. Previously, all of this work had to be done in the few hours in the day where the sun was at just the right position, otherwise the ice cream would melt at an incredible rate under the hot light, and all of the day’s work would thaw and waste away right before my eyes. Really, they don’t call it “hot” for nothing!

Now, things couldn’t be more different- It’s actually become a rarity for me to use natural light these days, working away in the darkness of the night to accomplish more than ever before.

If you had the chance to peruse that ebook, you should recognize this photo as the Rose Petal Ice Cream. A light, delicate little number that seems to simply glow. The secret behind that ethereal lighting is actually very simple…

Using the back of a chair to prop up my solid pink poster board, I start by laying the foundation with a smooth, seamless background. The strobe is positioned directly behind the set, facing away, with my usual white umbrella reflecting the flash back onto the subject, creating a nice, soft back light that highlights the edges of the ice cream. To soften the shadows in front, I set up my two little makeup mirrors on both sides.

Slight variations of this arrangement are my usual approach right now, and I couldn’t be happier with the consistently well-exposed results.

Best Intentions

All too often, food manufacturers grow so large that their products become nothing more than numbers; Objects fit for consumption, but not necessarily thought of as nourishment, whether it be physical or spiritual.  Food has so many roles to play, so many needs to fill, that to flatten it down to mere commodities should practically be a crime.  Of course, this is the foodie in me speaking, but companies that care about their food beyond its revenue generally make better offerings, and that’s something everyone can appreciate.  One such company is Bountiful Vegan, passionate about making vegan cookies that are not only delicious, but full of positive and uplifting energy.  Sound a bit far fetched?  Well, then you haven’t tried their Intention Cookies yet.

Not only do you get a fantastically tasty treat every time you buy one of their cookies, but a complimentary affirmation hidden inside the wrapper sweetens the deal. For anyone who’s had a rough day or could just use a little extra emotional boost, I can hardly think of a better combination. Each cookie is roughly the size of a small child’s head, by the way, and that alone should put a smile on your face!

Punctuated by a generous smattering of dark chocolate chips, the Love Cookie (orange chocolate chip) simply couldn’t be ignored, and didn’t last too long after being photographed. Turning out to be one of my favorites of the group, with such soft, gently yielding dough that would be good enough on its own, but positively shines next to the contrasting chocolate pieces. Happily, the chocolate is in perfect proportion to the cookie, and doesn’t overwhelm the delicate citrus notes that add just a light touch of zesty orange flavor. More exciting than your standard chocolate chip cookie, this is one that I can’t imagine would stick around many days in any house.

Nondescript and potentially easy to overlook, the Well-Being Cookie (pineapple coconut) is hardly as unremarkable as it may look.  Possessing a firmer bite than the previous softie, and a slightly coarse texture thanks to the shredded coconut, eating this cookie is an entirely different experience.  Generally “tropical” tasting, it’s hard to pick the pineapple flavor out of the mix, but there’s definitely something extra in there that couldn’t come from coconut alone.  Pleasingly well-salted, it’s an overall well-balanced and inoffensive baked good. While this one wouldn’t be my first pick, I still had no trouble finishing it in the end.

In another interesting little twist on a classic flavor, the Harmony Cookie (lemon snickerdoodle) shakes up the simple spice-encrusted cookie with the bright pep of lemon oil.  Cheerful as a sunny day, you can’t help but feel happy as you sink your teeth into that crackled crust of cinnamon and sugar.  Satisfyingly chewy, the combination of textures is so perfectly addictive, they could very well be flavored with motor oil and they would still be hard to turn down.  Thankfully, they’re absolutely delicious, gently perfumed with just a hint of lemon.

Saving what I hoped would be best for last, I finally dove into the Prosperity Cookie (choco choco-chip) with a voracious appetite. Surprisingly restrained in the sugar department, it was markedly less sweet than the previous baked beauties. More “adult” in flavor, featuring some bitter undertones of cocoa powder and accented by the much needed richness of the chocolate chips. Good, but not stellar, I’m starting to think that the previous knock-out flavors may have just set my expectations of this last cookie too high.

If you care about what you eat, and have a serious sweet tooth to satisfy, this is one compassionate business that you should definitely support. And who knows- You may just feel so inspired after eating one of these treats as to actually go out and accomplish your intentions!

Hop On Over

What’s sweet, minty, and green all over? Don’t worry, it’s not the set up for a bad joke, but a grasshopper pie! With roots going back only to the 60’s, it’s a relative new comer on the pie scene, and yet no one is quite sure where the name came from. I might speculate that it’s “green as a grasshopper,” but then why didn’t they call it frog pie, or Calyptomena viridis pie? Not as catchy? No, I can’t imagine that’s the reason…

It was allegedly said that “dinner guests sometimes click their heels with glee over a superb dessert,” but if that were the case, why aren’t there more grasshopper desserts? Wouldn’t we all be clicking our heels over every molten chocolate cake that crosses our lips?

Anyway, enough silliness, because this is one serious pie. Fortified with a splash of creme de mènthe and chilled, it’s a nostalgic adult treat that absolutely screams summer. Traditionally composed of marshmallows and cool whip, it’s one recipe that was all but off limits until recently, but all that has changed thanks to the brilliant Dandies Marshmallows. Now that vegan marshmallows are more abundant, I can even justify using a whole bag in one recipe!

My take on grasshopper pie has some significant differences from the original, however- Most notably, mine gets its bulk and lovely green hue thanks to some creamy avocados, not artificial whipped topping or nasty green dye. Freezing it makes for a truly refreshing treat, and gives it the added bonus of being stable enough to make popsicles out of. Pi-sicles, if you will. Yes, you heard me right- Frozen grasshopper pie on a stick, dipped in chocolate!

What are you waiting for? This a pie that belongs on your summer menu, one way or another!

Yield: Makes 8 - 10 Servings

Frozen Grasshopper Pie

Frozen Grasshopper Pie

My take on grasshopper pie has some significant differences from the original, however- Most notably, mine gets its bulk and lovely green hue thanks to some creamy avocados, not artificial whipped topping or nasty green dye. Freezing it makes for a truly refreshing treat, and gives it the added bonus of being stable enough to make popsicles out of.

Prep Time 15 minutes
Cook Time 5 minutes
Additional Time 4 hours 30 minutes
Total Time 4 hours 50 minutes

Ingredients

Chocolate Crust:

  • 1 1/2 Cups Chocolate Cookie Crumbs (15 Chocolate Sandwich Cookies)
  • 5 Tablespoons Vegan Butter, Melted

Mint Filling:

  • 1 Cup Pureed Avocado (From About 2 Small, Ripe Avocados)
  • 1 Teaspoon Lemon Juice
  • 1/4 Cup Crème de Menthe*
  • 1 10-Ounce Package Vegan Marshmallows
  • 1/4 Teaspoon Salt
  • 1/2 Teaspoon Peppermint Extract
  • 1/2 Teaspoon Vanilla Extract

Instructions

  1. Begin by combining the cookie crumbs and melted butter in a large bowl, and stir well until there are no dry spots. Transfer this mixture to a 9-inch round pie tin, and use your fingers to press it evenly across the bottom and up the sides. Place the crust in your freezer until firm, at least 30 minutes.
  2. Meanwhile, you can start preparing the filling. Puree your avocado using a blender or food processor, along with the lemon juice and crème de menthe. Scrape down the sides of the bowl periodically ensure you have no lumps of avocado. Set aside.
  3. Place all of the marshmallows in a medium sauce pan, and set it over moderate heat. Stir continuously until the marshmallows have completely melted, and quickly transfer the marshmallow goo into your food processor or blender. Pulse to combine, and add in the salt, mint, and vanilla extract. Scrape down the sides once or twice between pulses, until the mixture is homogeneous. Pour into your frozen crust, and return the whole thing to the freezer.
  4. Let freeze for at least 4 hours, until set and sliceable. If desired, top with chocolate shavings, curls, or ganache.
  5. Alternately, cut into 8 slices, insert lollipop or popsicle sticks into the side crust, and dip in homemade magic shell (a double batch will cover the whole pie nicely and leave you with plenty leftover for other ice cream treats.)

Notes

*To make this pie kid-friendly, replace the alcohol with 1/4 cup plain non-dairy milk and 1 teaspoon peppermint extract.

Recommended Products

Please note that some of the links above are affiliate links, and at no additional cost to you, I will earn a commission if you decide to make a purchase after clicking through the link. I have experience with all of these companies and I recommend them because they are helpful and useful, not because of the small commissions I make if you decide to buy something through my links.

Nutrition Information:

Yield:

10

Serving Size:

1

Amount Per Serving: Calories: 255Total Fat: 11gSaturated Fat: 5gTrans Fat: 0gUnsaturated Fat: 5gCholesterol: 15mgSodium: 173mgCarbohydrates: 37gFiber: 2gSugar: 25gProtein: 2g

All nutritional information presented within this site are intended for informational purposes only. I am not a certified nutritionist and any nutritional information on BitterSweetBlog.com should only be used as a general guideline. This information is provided as a courtesy and there is no guarantee that the information will be completely accurate. Even though I try to provide accurate nutritional information to the best of my ability, these figures should still be considered estimations.

Olive You

Despite the fact that the 4th of July is perhaps the most predictably scheduled holiday on the calendar, I still feel blindsided by its seemingly sudden approach. It’s hard to believe that it’s even July already- What happened to the other 6 months that are supposed to come before it? I can’t recall a single one.

No need to panic though, Independence Day is such a laid back and happy-go-lucky event that there’s rarely much preparation to be done in advance. Slice up a big watermelon, pack a giant cooler full of ice, sodas, and beer, and I’d say that you’re all set for a party. Once your guests come, toss some veggie burgers and dogs on the grill, and then drag the kids down to the beach at night to watch the fireworks. Sounds like a pretty good day, right?

Well, if that’s not enough for you, here’s one super simple hors d’oeuvre that you can whip up and impress your friends with. Tapenade, a basic paste made of pureed olives, is not a new concept in the least, but only recently have I gained an appreciation for olives and discovered how delicious they can be. Now, I’ve found myself smearing this chunky dip over crackers, in sandwiches, and even stirred into hot pasta. My version is somewhat heavy on the garlic, but not so much so that you have to worry about garlic breath after enjoying a dollop.

Although some tapenades are completely smooth, I prefer mine with a bit of texture, so I only pulse the mixture in the food processor. You’re welcome to puree the heck out it if you prefer.

Yield: Makes 1 Cup; 16 Servings

Roasted Garlic Tapenade

Roasted Garlic Tapenade

This chunky kalamata tapenade is is somewhat heavy on the garlic, but not so much so that you have to worry about dragon breath after enjoying a dollop.

Prep Time 5 minutes
Total Time 5 minutes

Ingredients

Instructions

  1. Place all of the ingredients in your food processor or blender, and pulse until everything is well-incorporated but still slightly chunky. Dish it up alongside chips or crackers for a “self-serve” kind of snack, or spoon a dollop on small pieces of toast and top with fresh chives for easy little crudites.

Nutrition Information:

Yield:

16

Serving Size:

1

Amount Per Serving: Calories: 27Total Fat: 3gSaturated Fat: 0gTrans Fat: 0gUnsaturated Fat: 2gCholesterol: 0mgSodium: 54mgCarbohydrates: 1gFiber: 0gSugar: 0gProtein: 0g