Baking a Difference

You wouldn’t know it at a glance or from the taste, but there’s a lot more than meets the tongue baked into every immaculate mahogany and tawny brown square from Greyston Bakery. If you can temper your appetite long enough to examine the label, you’ll know there’s something different about these treats beyond the essential formula. Raising up people within the community is just as important as raising dough, literally and figuratively, which their Open Hiring Model especially admiral. It should come as no surprise that this progressive company would partner with fellow corporate radicals, Ben & Jerry’s, to supply the infamous brownies in their game-changing vegan pints. My first taste of those darkly decadent, fudgy chunks came smothered in rapidly melting chocolate ice cream, but it wasn’t long before they compelled me to seek out a whole, bare bite.

Genuinely baked bars of soft dark chocolate, they’re the platonic ideal of any brownie, making the case for vegan desserts on a grand new scale. Very sweet, undeniably indulgent, super chewy, and complete with gently crackled top, I dare you to find a single flaw along those edible fault lines.

Now, after 36 years, achieving such lofty goals with unprecedented success has encouraged these bold bakers to expand their offerings with that same spirit of inclusivity in mind. For their second act in vegan baking activism, at long last, a blondie has been born.

The Vegan Cinnamon Roll Blondie is so soft and tender, each sweet morsel practically melts in your mouth. Sprinkled with cinnamon sugar for a light crunch and extra pop, they could be alternately called “snickerdoodle bars” to suit the simplistic approach. No nuts, no fruits, no nonsense, they’re sure to please the pickiest of eaters. Every bit as dense and satisfying as their cocoa counterparts, it’s a victory for all of us to celebrate, right down to the factory line, alongside the workers themselves.

Though it’s hard to beat a fresh blondie straight out of the box, they really come alive when served slightly warm… And, it should come as no surprise, with a scoop of ice cream on top.

You’re a Peach, My Dear

Few things can match the sensation of biting into a ripe, fresh peach at the height of summer, so juicy that it must be eaten over a sink. Soft fuzz easily gives way to tender flesh brilliantly sweet, floral, and aromatic. It’s a perfect dessert, all by itself, no garnishes need apply.

Sadly but surely, the seasons are marching onward, away from this most wonderful time of year. Don’t miss your chance to indulge in the last of this year’s harvest.

These delightfully chewy cookie bars present another way to enjoy these incomparable fruits, even if the selection isn’t quite as robust. Toasted pecans and fresh peaches, the star of the show, lend these treats a gentle Southern accent. Each sweet square is lightly caramelized through the baking process, ending with a rich, toffee-like flavor.

Yield: Makes 24 - 30 Bars

Southern Peach Streusel Bars

Southern Peach Streusel Bars

These delightfully chewy cookie bars present another way to enjoy these incomparable fruits, even if the selection isn’t quite as robust. Toasted pecans and fresh peaches, the star of the show, lend these treats a gentle Southern accent. Each sweet square is lightly caramelized through the baking process, ending with a rich, toffee-like flavor.

Prep Time 15 minutes
Cook Time 45 minutes
Total Time 1 hour

Ingredients

Peach Filling:

  • 5 Ripe Peaches, Divided
  • 1/2 Cup Granulated Sugar
  • 1 Tablespoon Lemon Juice
  • 3 Tablespoon Cornstarch
  • 1/2 Teaspoon Vanilla Extract
  • 1/4 Teaspoon Ground Ginger

Cookie Base and Streusel:

  • 1/2 Cup Vegan Butter
  • 1 Cup Dark Brown Sugar, Firmly Packed
  • 1 1/2 Cups All Purpose or White Whole Wheat Flour
  • 1/2 Cup Finely Ground Pecan or Almond Meal
  • 2 Tablespoons Cornstarch
  • 1/2 Teaspoon Ground Cinnamon
  • 1/2 Teaspoon Salt
  • 1 – 2 Tablespoons Plain Non-Dairy Milk
  • 3/4 Cup Toasted and Chopped Pecans

Instructions

  1. First, prepare the filling so that it has time to cool. Begin by removing the pits from four of your peaches, and roughly chopping the flesh before tossing it into your food processor along with the sugar and cornstarch. Blend thoroughly until smooth, and then transfer the puree into a medium sauce pan. Set on the stove over medium heat, whisking occasionally, until the mixture has thickened significantly and bubbles are breaking regularly on the surface. Turn off the heat, and incorporate the vanilla and ginger. Set aside and let cool.
  2. Preheat your oven to 350 degrees, lightly grease 9 x 13-inch baking pan; Set aside.
  3. In the bowl of a stand mixer or food processor, beat the butter briefly to soften. Add in the brown sugar and thoroughly cream together with the vegan butter, until fluffy and homogeneous. Sift in the flour, pecan or almond meal, cornstarch, cinnamon, and salt, and mix on low speed to combine. The resulting mixture will be rather dry, so with the mixer running. slowly drizzle in the non-dairy milk, a teaspoon at a time, using just enough to bring everything together into a cohesive dough when pressed.
  4. Take 2/3 of that dough and crumble it across the bottom of your prepared pan. Use your fingers to press it out into one even layer that will form the base. If you don’t have enough to cover the bottom, you can use a bit more of the dough, but bear in mind that the base shouldn’t be too thick. Bake in your preheated oven for 12 – 15 minutes, until golden brown.
  5. Meanwhile, take your chopped pecans, and knead them into the remaining dough to create the streusel topping.
  6. Once the base is ready, remove it from the oven, and evenly spread the cooled peach filling on top. Pit and roughly chop the one remaining peach, and scatter it across the peach jam filling. Finally, use your fingers to break apart clumps of streusel, and sprinkle them over the peaches. Slide the pan bake into the oven, and bake for another 20 – 25 minutes, until aromatic and the streusel is golden brown all over. Let cool completely before slicing.

Recommended Products

Please note that some of the links above are affiliate links, and at no additional cost to you, I will earn a commission if you decide to make a purchase after clicking through the link. I have experience with all of these companies and I recommend them because they are helpful and useful, not because of the small commissions I make if you decide to buy something through my links.

Nutrition Information:

Yield:

30

Serving Size:

1

Amount Per Serving: Calories: 147Total Fat: 8gSaturated Fat: 2gTrans Fat: 0gUnsaturated Fat: 5gCholesterol: 8mgSodium: 62mgCarbohydrates: 18gFiber: 2gSugar: 12gProtein: 2g

All nutritional information presented within this site are intended for informational purposes only. I am not a certified nutritionist and any nutritional information on BitterSweetBlog.com should only be used as a general guideline. This information is provided as a courtesy and there is no guarantee that the information will be completely accurate. Even though I try to provide accurate nutritional information to the best of my ability, these figures should still be considered estimations.

Not Half Bad

Any chance to celebrate is one worth taking, as is evident by the profusion of often dubious national holidays. Adding a touch of whimsy to the monotonous daily routine, marking a date as something special to anticipate, the reason to rejoice is not actually important. Those moving targets simply provide a convenient excuse and a general focus for unscheduled merriment. As silly as National Splurge Day sounds, I still can’t be too mad at it for the joy it must bring a select few. If you have the means and the inclination, why not?

While I’m probably the worst person to consult about commemorating a real momentous date on the calendar, such as my own birthday, I can fully appreciate the potential it holds. It somehow figures that my half-birthday, a real non-event if there ever was one, tends to get more attention.

No matter how many years and months I tack onto my own age, certain things never get old, such as the love of chocolate chip cookies and brownies. Since it’s my half-birthday, I had half a mind to make something special which resulted in this half-and-half mashup of the two. Baked brownies that emerged from the oven with an impossibly lustrous, glossy, crackled crust seemed almost too beautiful to cover up, but it was too late to pull back on the reins by then. Buttery raw cookie dough smothers the entire sheet pan, more decadent that plain whipped frosting yet not nearly as tooth-achingly sweet.

I’m not one to toot my own horn, but I have to admit, these exceeded expectations. First of all, they’re completely gluten-free, which is not my strong suit when it comes to baking, and secondly, there’s no refined sugar. Rather, these decadent treats employ coconut sugar to evoke the nostalgic flavor of earthy molasses, further enhanced by the roasted notes of coffee in the brownie batter. In fact, if you can’t make it past that base and just call it a day with the Best Vegan Brownies Ever©, I won’t blame you one bit. When you want to pull out all the stops and really celebrate life, no matter the real occasion, this dessert is for you.

Yield: Makes 24 - 36 Bars

Half Baked Bars

Half Baked Bars

When you want a bite of cookie dough along with the rich density of dark chocolate brownies, these are the ultimate in decadence. Honestly, if you can’t make it past that fudgy base and just call it a day with the Best Vegan Brownies Ever, I won’t blame you one bit. When you want to pull out all the stops and really celebrate life, no matter the real occasion, this dessert is for you.

Prep Time 20 minutes
Cook Time 26 minutes
Additional Time 2 hours
Total Time 2 hours 46 minutes

Ingredients

Best Vegan Brownies Ever:

  • 1/2 Cup (3 Ounces) Semi-Sweet Chocolate Chips
  • 1/2 Cup Hot Coffee
  • 2 Cups Coconut Sugar
  • 1/2 Cup Olive Oil
  • 2 Cups Oat Flour
  • 1 Cup Dutch-Processed Cocoa Powder
  • 1 Teaspoon Baking Powder
  • 3/4 Teaspoon Salt
  • 1 Tablespoon Vanilla Extract
  • 1/2 Cup Chopped Walnuts

Cookie Dough Topping:

  • 2 Cups Vegan Butter
  • 1 1/2 Cups Coconut Sugar
  • 1 Tablespoon Vanilla Extract
  • 1/4 Teaspoon Salt
  • 3 1/4 Cups Oat Flour
  • 1 Cup (6 Ounces) Semi-Sweet Chocolate Chips

Instructions

  1. Preheat your oven to 350 degrees and line a 13 x 9-inch baking pan with parchment paper, leaving a good length overhanging the edges to form a sling. This will make for easier removal later on. Lightly grease and set aside.
  2. For the brownie base, place the chocolate chips in a large bowl and pour the hot, freshly brewed coffee on top. Let sit for a minute to begin melting the chocolate before stirring. Stir vigorously before introducing the coconut sugar. Continue mixing until smooth, dissolving the sugar and fully melting the chocolate. Pour in the oil and blend until homogeneous.
  3. In a separate bowl, whisk together the oat flour, cocoa, baking powder, and salt. Ensure that there are no lumps before adding the dry goods into the bowl of wet. Add the vanilla and nuts last, and mix thoroughly until there are no remaining pockets of flour or cocoa. Don’t worry about over-mixing because there’s no gluten here, so go crazy!
  4. Transfer the batter to your prepared pan and bake for 24 – 26 minutes, until the top is crackled and glossy, and the interior is still just slightly moist when a toothpick is inserted into the center. Cool completely before proceeding.
  5. To make the cookie dough topping, cut the butter into small cubes before placing them in your food processor. Add the sugar and pulse to combine, pausing to scrape down the sides as needed. Add the vanilla and salt next, blending thoroughly to incorporate. Introduce half of the flour to begin with, allowing the machine to run until its fully integrated. Add the remaining measure of flour and puree once more.
  6. If you’d like to keep your chips on the chunkier side, stir them in by hand. I like mine a bit more broken down and random in size, so I toss mine in last and pulse until the pieces are more or less evenly distributed throughout the mixture. It will be very soft, like frosting, at this point.
  7. Spread the cookie dough topping over the cooled brownies in a smooth, even layer. Refrigerate the whole pan for 2 hours for more even, clean slices, or cut and serve right away if you simply can’t wait.

Recommended Products

Please note that some of the links above are affiliate links, and at no additional cost to you, I will earn a commission if you decide to make a purchase after clicking through the link. I have experience with all of these companies and I recommend them because they are helpful and useful, not because of the small commissions I make if you decide to buy something through my links.

Nutrition Information:

Yield:

36

Serving Size:

1

Amount Per Serving: Calories: 281Total Fat: 16gSaturated Fat: 8gTrans Fat: 0gUnsaturated Fat: 8gCholesterol: 27mgSodium: 157mgCarbohydrates: 31gFiber: 2gSugar: 20gProtein: 3g

All nutritional information presented within this site are intended for informational purposes only. I am not a certified nutritionist and any nutritional information on BitterSweetBlog.com should only be used as a general guideline. This information is provided as a courtesy and there is no guarantee that the information will be completely accurate. Even though I try to provide accurate nutritional information to the best of my ability, these figures should still be considered estimations.

Sometimes, You Feel Like a Nut…

And sometimes, you feel like a peanut. A peanut butter cookie, to be more specific. Announcements of new national food “holidays” seem to be getting a bit out of control lately, but this one, National Peanut Butter Cookie Day, gets an easy thumbs up from me. Such a classic treat yet so terribly underappreciated, I’m glad this snack time staple is finally getting a moment in the spotlight. Chewy, crunchy, crispy, creamy, chocolatey, salty, spicy, or even savory, there’s no possible way to go wrong when concocting your own. As a peanut butter lover, I have a considerable cache of recipe options myself.

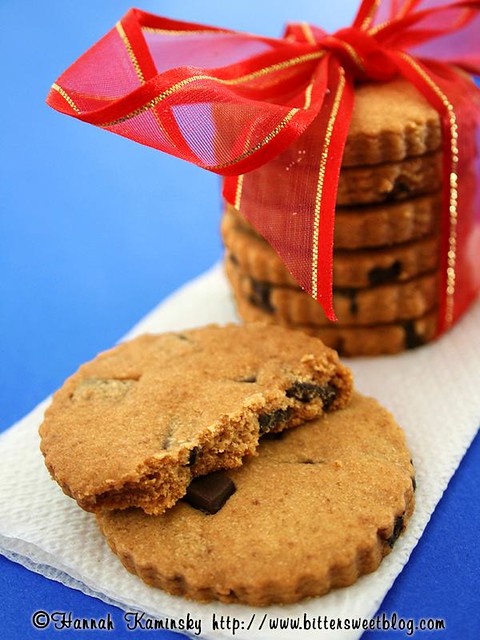
In a rare doubleheader recipe post, I’ve offered contrasting approaches to the same nutty morsel: a buttery, chocolate-flecked shortbread and thick, bakery-style crosshatched beauties

Way back in 2009, I devised a way to get the maximum peanut flavor out of a minimum of ingredients and effort. Thus, the easiest cookie ever was born! You probably have all of the components in your pantry right now, just waiting to join forces and create instant sweet tooth gratification. 1-2-3 Peanut Butter Cookies are a fool-proof option for both the baker and the eater.

If you’re in the mood for a dessert with a bit of bonus protein and fiber, look no further than these Gluten-Free Peanut Butter Cookies (but PLEASE do look beyond those dreadful old photos.) Red lentils add an unexpected nutrition boost without detracting from the peanut buttery goodness.

What’s your favorite type of peanut butter cookie? Do you have a secret formula, or trusted source? How are you celebrating today?

In the Palm of My Hands

Glowing like a bold orange beacon in my kitchen, the allure was irresistible. Undeniably handsome, complex yet versatile, and as rich as Croesus, this new infatuation had all the makings of a wild, illicit love affair. Uninformed outsiders would find it shocking or downright offensive, but the truth is far less controversial than gossip may lead you to believe. Palm oil sourced from Malaysia has a lot to offer for the passionate cook, baker, and eater alike.

Mom’s Meet provided me with the opportunity to dig deeper on this topic, shining a light on an incredible ingredient often overlooked by the average American shopper. Malaysian palm oil is sustainably sourced, committed to orangutan conservation, wildlife biodiversity, renewable energy with zero waste, and deforestation avoidance.

Being a tropical oil that’s solid at room temperature, most comparisons are drawn to the latest superfood darling, coconut oil. Aside from the obvious differences in color and flavor, palm oil distinguishes itself in its versatility, with a smoke point of 450 degrees, far beyond that of coconut oil’s 350-degree limit. That makes it excellent for high-heat preparations like frying, grilling, or broiling. Melting at around 70 degrees, the fact that it remains solid at room temperature makes it an excellent substitute for harmful trans-fats in commercial products.

If you thought coconut oil had the movie theater popcorn game on lock, be prepared for a snacking revolution here. Brilliantly buttery yet still mild in flavor, all it needs is a pinch of salt to make bare kernels shine brighter than any rising star on the silver screen.

Once liquefied, Malaysian palm oil can even be emulsified into a golden vinaigrette. Inspired by the Sweet & Spicy Harissa Slaw in Real Food, Really Fast, I tossed my fiery blend with a dab of this orange elixir instead, which was received with positively glowing reviews. That glorious color comes from an abundance of carotenoids, by the way, bearing 15 times more vitamin A than the carrots themselves.

Lest you thought I was ignoring my sweet tooth this whole time, rest assured that rigorous testing proved it a highly qualified applicant for baking operations. Chocolate chip cookies came out of the oven soft, moist, tender, and quite beautiful, if I do say so myself. Sink your teeth into one of these behemoths for a healthier taste of a childhood classic, no dairy nor eggs in sight.

For my final trick, I must admit that my attempt at making a nut-free cheese went terribly awry, but in the wake of that failure came an even greater culinary coup…

Cultured butter, infused with both probiotics and luscious flavor, creamy and spreadable, meltable, and downright delectable. No dairy, no nuts, no gluten, no nonsense. I couldn’t keep it in the fridge long enough to test it on loftier goals like homemade croissants or puff pastry, because with just one smear on the average ear of corn or slice of toast, I was hooked. This recipe alone is enough reason to deviate from the typical shopping list and stock up on a new pantry staple.

Malaysian palm oil deserves a place in every kitchen across the globe, including yours. Undoubtedly, you’ve eaten it before in packaged foods or used it in cosmetics, but have you cooked or baked with it? With a sustainable source close at hand, unleash your adventurous side and try a splash in your next succulent creation.

Yield: 6 - 8 Large Cookies

Palm Oil Chocolate Chip Cookies

Palm Oil Chocolate Chip Cookies

Thick, soft, and chewy chocolate chip cookies that may just rival what mom used to make!

Prep Time 15 minutes
Cook Time 15 minutes
Total Time 30 minutes

Ingredients

  • 1 Cup + 2 Tablespoons All Purpose Flour
  • 3/4 Teaspoon Baking Powder
  • 1/2 Teaspoon Salt
  • 1/4 Cup Semi-Sweet Chocolate Chips
  • 1/4 Cup Dark Brown Sugar, Firmly Packed
  • 1/4 Cup Maple Syrup
  • 1/3 Cup Red Palm Oil, Melted
  • 1 Teaspoon Vanilla Extract

Instructions

  1. Preheat your oven to 350 degrees and line a baking sheet with either parchment paper or a silpat.
  2. In a medium bowl, whisk together the flour, baking powder, and salt so that all of the dry goods are evenly distributed throughout the mixture. Add in the chocolate chips and toss to coat.
  3. Separately, combine the sugar, maple syrup, melted palm oil, and vanilla. Stir well, and then add the wet ingredients into the bowl of dry. Using a wide spatula, mix just enough to bring the batter together smoothly without over-beating it. Use a 3-ounce ice cream scoop to portion out cookies, and place them with at least 1 1/2 between each cookie on your prepared baking sheet. They spread out to become sizable cookies, so I usually bake about 9 per sheet.
  4. Flatten them out slightly with lightly moistened hands, and bake for 10 – 12 minutes, until barely browned around the edges and no longer shiny on top. They may looks a bit underdone, but they will continue to bake once removed from the oven, and you want to keep them nice and chewy. Let the cookies rest on the sheets for 10 minutes before cooling completely on a wire rack.

Nutrition Information:

Yield:

8

Serving Size:

1

Amount Per Serving: Calories: 262Total Fat: 28gSaturated Fat: 14gTrans Fat: 0gUnsaturated Fat: 13gCholesterol: 2mgSodium: 166mgCarbohydrates: 3gFiber: 0gSugar: 2gProtein: 2g
Yield: 1 3/4 Cups; 28 Tablespoons

Cultured Butter

Cultured Butter

Homemade cultured vegan butter, infused with both probiotics and luscious flavor is creamy, spreadable, meltable, and downright delectable.

Prep Time 10 minutes
Additional Time 6 hours
Total Time 6 hours 10 minutes

Ingredients

  • 1/2 Cup Plain, Unsweetened Vegan Yogurt
  • 1/4 Cup Aquafaba
  • 1 Tablespoon White Miso Paste
  • 1 Teaspoon Nutritional Yeast
  • 1/4 Teaspoon Salt
  • 1 Cup Red Palm Oil, Melted

Instructions

  1. Place all of the ingredients into your blender except for the palm oil, and blend until thoroughly combined. While allowing the motor to run on high speed, slowly drizzle in the melted palm oil, allowing the mixture to emulsify smoothly.
  2. Transfer the mixture to a glass container and cover. Let it solidify in the fridge for at least 6 hours, or the freezer for 1.
  3. The butter will be soft and spreadable straight out of the fridge. It melts beautifully and you can cook with it, too! I haven’t yet tested it for baking, but if you do, let me know about it in the comment section.

Notes

Properly sealed and chilled, the butter should keep in the fridge for up to two weeks.

Nutrition Information:

Yield:

28

Serving Size:

1

Amount Per Serving: Calories: 75Total Fat: 8gSaturated Fat: 4gTrans Fat: 0gUnsaturated Fat: 4gCholesterol: 0mgSodium: 47mgCarbohydrates: 1gFiber: 0gSugar: 1gProtein: 1g

A Flurry of Inspiration

Winter is in full force, or at least, so I’m told. Forecasts filled with snow and ice threaten large swaths of the US, while records show that this year’s Superbowl was the coldest on record, crushing previous predictions with an icy flourish. Temperatures ranking just above negative numbers boggle my mind; a sensation so unthinkable, so impossible, it’s almost painful to imagine. That’s because beautiful California remains a shining beacon of eternal summer, setting records pushing the mercury up in the opposite direction. Basking in the sunshine on a brilliant 75-degree day, I have to remind myself that this is still February. Somehow, this is still winter.

Although that does make it less appealing to crank up the oven, those longer days of bright natural light inspire an endless stream of photo shoots, and with them, new recipes galore. In homage to the flurries still blanketing the rest of the northern hemisphere with frozen white fluff, my mind went to memories of clean, pure, white snow, freshly fallen and immaculate. So delicate were those perfectly formed crystals, which I examined closely on gloved hands as they landed, that they seemed as if they were formed individually by some master craftsman in the sky.

These particular snowflakes are cut from the same cloth, but as a handmade treat, still retain personalities all their own. Celebrating simplicity, they’re merely the best vanilla cookie you’ve ever tasted. Boldly infused with powder from the whole bean, they’re not shy about shouting this warm, classic flavor from the rooftops- Or wherever else they may settle. Mochiko is the secret to keeping each bite soft and tender, while remaining firm enough to resist spreading in the oven. Do not confuse this with regular rice flour, as the texture is very different.

Whether your snow day involves making snowmen or spending an unseasonably sweltering afternoon in the kitchen, may the end results always be as sweet!

Yield: Yield is variable, depending on size of cookie cutter

Ultimate Vanilla Bean Cut-Out Sugar Cookies

Ultimate Vanilla Bean Cut-Out Sugar Cookies

Celebrating simplicity, they’re merely the best vanilla cookie you’ve ever tasted. Boldly infused with powder from the whole bean, they’re not shy about shouting this warm, classic flavor from the rooftops- Or wherever else they may settle.

Prep Time 20 minutes
Cook Time 14 minutes
Additional Time 1 hour
Total Time 1 hour 34 minutes

Ingredients

  • 1 Cup Vegan Butter
  • 1 1/4 Cups Granulated Sugar
  • 2 3/4 Cups All-Purpose Flour
  • 1 Cup Mochiko
  • 1/4 Cup Arrowroot Powder
  • 1 1/2 Teaspoons Vanilla Bean Powder
  • 1/2 Teaspoon Salt
  • 1/2 Teaspoon Baking Powder
  • 1/3 Cup Plain Non-Dairy Milk

Instructions

  1. Use your stand mixer to thoroughly cream the butter and sugar together. In a separate bowl, sift the flour, mochiko, arrowroot, vanilla powder, salt, and baking powder, stirring well to combine. Add about half of these dry ingredients into the mixing bowl, processing it until fully incorporated. Pour in the non-dairy milk along with the remaining flour mixture. Continue to mix until it forms into a smooth, homogeneous dough. Form the dough into two balls, flatten them out a bit, wrap separately in plastic and chill for at least one hour before proceeding.
  2. After the dough has had time to rest in the refrigerator, start heating your oven to 350 degrees.
  3. On a lightly floured surface, roll out the first ball of dough to about 1/8th of an inch in thickness. Use your favorite cookie cutters to shape the cookies, and place them on baking sheets lined with silicone baking mats or parchment paper. Brush any excess flour off the cookies, but don’t go crazy if it still has a light coating; most of it will bake in seamlessly.
  4. Bake for about 8 – 14 minutes, depending on the size of your cookies, until no longer shiny and the edges are firm. Don’t wait for them to brown because they will become overcooked and dry by the time they cool.
  5. Cool completely on a wire rack before storing in an airtight container at room temperature.
  6. Yield is variable, depending on size of cookie cutter

Recommended Products

Please note that some of the links above are affiliate links, and at no additional cost to you, I will earn a commission if you decide to make a purchase after clicking through the link. I have experience with all of these companies and I recommend them because they are helpful and useful, not because of the small commissions I make if you decide to buy something through my links.

Nutrition Information:

Yield:

36

Serving Size:

1

Amount Per Serving: Calories: 109Total Fat: 5gSaturated Fat: 3gTrans Fat: 0gUnsaturated Fat: 2gCholesterol: 14mgSodium: 78mgCarbohydrates: 14gFiber: 0gSugar: 7gProtein: 1g

All nutritional information presented within this site are intended for informational purposes only. I am not a certified nutritionist and any nutritional information on BitterSweetBlog.com should only be used as a general guideline. This information is provided as a courtesy and there is no guarantee that the information will be completely accurate. Even though I try to provide accurate nutritional information to the best of my ability, these figures should still be considered estimations.