A Winner, and A Winning Frosting

Every past giveaway I’ve hosted, a random number generator has picked the winner for me. Although that was the plan for this one as well, one particular comment snuck in right before the entry period closed and I just couldn’t ignore how skillfully and thoughtfully written it was. This creative writer submitted a whole poem, and a really cute one at that! So Allison, you’ll be hearing from me soon because you’re the winner of the BabyCakes cookbook!

And Allison’s winning poem is as follows…

Oh, baby, BabyCakes!
What would I mix up?
What would I make?

Well…

Back when I was small
And could eat anything at all
(Or thought so!)
Before the days of xanthan gum,
Brown rice flour, millet, sorghum,
I’d stir eggs & softened butter
Into bowls of fine white flour,
Add chocolate chips & dark vanilla.
Our mother warned, “Raw eggs will kill ya!”
But sis & I still licked the spoon.
Those cookies could have won the moon.

It’s been three years since Doctor said,
“No more gluten, no more bread,
Or eggs, or milk, or cheese, or dairy.”
Which made me truly sad, and wary.
These days I couldn’t eat that batter
If it were served by the Mad Hatter
With pots of tea and a drenched Dormouse.
(I’d get so sick, I’d be stuck in the house.)

So if I were to win this book,
I know I’d make the cookies first—
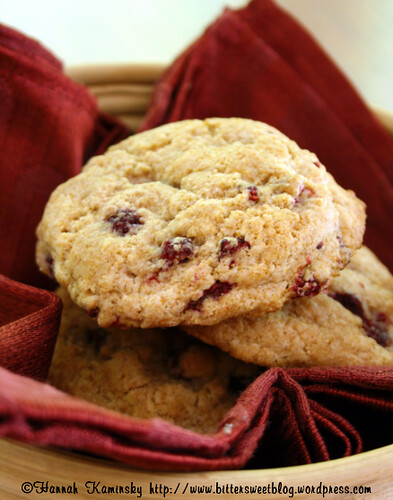
The chocolate chip cookies, that is.
I’d lick the spoon, I’d taunt the moon,
I’d send you a batch, I’d sugar-crash,
I’d invite my friends, I’d make amends
For these relentless rhymes
With chocolate chip (gluten-free, dairy-free, egg-free!) cookies, and tea, oh my!

Thanks for making this giveaway so much fun!

And for everyone who didn’t win, don’t worry, because I still have a fantastic prize for you as well…

Remember that frosting recipe that was the biggest disappointment of all?  Well, I went back and reworked it, until it actually came out as advertised: Creamy, silky, and very lightly sweetened so that it might top any sort of cake perfectly, without inducing a sugar coma.  One of the best frostings I’ve ever had- And I don’t say that sort of thing lightly- This is one definitely a keeper. I can see why frosting shots would be so popular if this was on the menu!

Coconut Oil Frosting
Adapted from BabyCakes

3/4 Cup Plain Soymilk
3/4 Cup Plain Powdered Soymilk
5 Tablespoons Light Agave Nectar
1 Tablespoon Vanilla Extract
1 1/2 Cups Coconut Oil, Melted
1 1/2 Tablespoons Fresh Lemon Juice
1/4 Cup Instant Clear Gel
3/8 Teaspoon Xanthan Gum
1/4 Teaspoon Salt

In your food processor, pulse together the soymilk, soymilk powder, agave, and vanilla to combine. With the motor running, very slowly drizzle in the coconut oil, as if you were making a salad dressing. Add in the lemon juice next. Very slowly sprinkle in the instant clear gel and xanthan gum with the motor still going, followed by the salt, and let the machine run for about a minute. Scrape down the sides and pulse once more. The mixture will seem rather loose at the point, so don’t panic.

Place the whole bowl of the food processor in your fridge, and let it chill for about 2 hours. The frosting will seem a bit hard afterward. Reinstall the bowl on the machine, scrape down the sides, and let it run for about 5 minutes. The mixture may look chunky or curdled for a brief period, but just let the machine continue to work and it will eventually smooth out. Scrape down the sides as needed.

Apply to your cake(s) as desired, and keep the frosting in a cool place. Do NOT put it back in the fridge, as it will become hard, and don’t let it stand in the hot sun for too long or it will melt.

When “Flaky” is a Compliment

Homey, hearty, and jam-packed full of fruits, the strudels that I’ve come to know throughout the years could hardly be described as delicate, or even the least bit elegant. Heavy with gooey apples and thick pastry to hold it all together, they certainly classified as comfort food, but it would be generous to describe these desserts as “rustic.” That’s why this latest Daring Baker challenge had me a bit puzzled at first… Until I realized that this recipe produced an entirely different sort of beast.

The May Daring Bakers’ challenge was hosted by Linda of make life sweeter! and Courtney of Coco Cooks. They chose Apple Strudel from the recipe book Kaffeehaus: Exquisite Desserts from the Classic Cafés of Vienna, Budapest and Prague by Rick Rodgers.

With pastry so paper-thin that purists insist you can “read a newspaper through it,” this was much more similar to phyllo dough than the thin pie crust I typically encounter. Seeing that is what got me thinking of baklava, pretty much the best thing anyone could ever do with phyllo, in my opinion.

Merging these two sweet treats, a rich filling of walnuts and spices is encased in that flaky dough, and brushed with ample amounts of agave nectar while it’s still piping hot. Much easier to cut and serve than traditional baklava, it was definitely neater to eat, although I’ll admit right away that I could have definitely rolled the dough much thinner. Not quite perfect, but still a delicious treat that I would have never tried to make without this challenge. Served alongside a quenelle of vanilla ice cream and topped with a light dusting of powdered sugar, however, any number of imperfections can be easily overlooked.

For this variation, simply mix together the following in a large bowl…

2 Cups Chopped Walnuts
1/2 Cup Unsweetened Apple Sauce
1/2 Cup Granulated Sugar
1 Tablespoon Cornstarch
1 1/2 Teaspoons Ground Cinnamon
Pinch Cardamom
Pinch Salt

Spoon it onto the dough in a straight line, wrap, and bake just as written in the original recipe. Best eaten warm!

Po-Tay-To, Po-Tah-To; Just Not May-O!

Like clockwork, as the days grow progressively longer and warmer, grills emerge from hibernation at just about any opportunity, eager as their owners to host all of the newly sprung vegetables, plus plenty of old favorites. 

Summer holidays practically require the presence of a grill, and with Memorial Day just around the corner, it seems like high time to dust that old furnace off.  Tossing on veggie burgers and not-dogs, toasting up simple white bread buns to golden-brown perfection, it’s the start of a perfectly “American” meal.  But what to serve alongside those main dishes?  Perhaps a side of fries or chips, maybe potato salad- Just as long as the lovable spud makes an appearance.

Here’s where my menu takes a somewhat different turn. Potato salad sounds great in concept, but mayonnaise, dairy-based or otherwise, is simply not welcome in this household. Serve something containing even a half ounce of that white glop, and you may very well have an all out revolt on your hands.

Thus, eschewing this vile condiment in favor of a lighter dressing, I tend to favor olive oil, lemon juice, and whatever fresh herbs happen to be on hand. This time though, it felt necessary to start the season off with a bang and spice things up a bit.

Essentially glorified samosa filling freed of its pastry, this starchy side is just the thing to liven up any backyard BBQ spread. Delicious served both warm or chilled, it can easily be made a day ahead of time to give you one less thing to worry about later.

Don’t wait until you have a party to make it though- Any number of savory mains would pair beautifully with these spicy potatoes, and you can keep it for up to a week in the fridge.

Yield: Serves 6 – 8 as a side dish

Samosa Potato Salad

Samosa Potato Salad

Essentially glorified samosa filling freed of its pastry, this starchy side is just the thing to liven up any backyard BBQ spread. Delicious served both warm or chilled, it can easily be made a day ahead of time to give you one less thing to worry about later.

Prep Time 5 minutes
Cook Time 18 minutes
Total Time 23 minutes

Ingredients

  • 2 Pounds White New Potatoes
  • 1 Bay Leaf
  • 1/3 Cup Olive Oil
  • 2 – 3 Large Shallots, Chopped (About 1 Cup)
  • 4 Cloves Garlic, Finely Minced
  • 1 Inch Fresh Ginger, Peeled and Grated
  • 2 Teaspoons Garam Masala
  • 1/2 Teaspoon Ground Coriander
  • 1/2 Teaspoon Turmeric
  • 1 Teaspoon Ground Cumin
  • 1 Tablespoon Fresh Lemon Juice
  • 1 1/2 Cups Frozen Peas
  • Salt and Pepper
  • Fresh Chives (Optional)

Instructions

  1. Wash the potatoes thoroughly before chopping them into bite-sized pieces. Place them in a large pot, and fill it with cold water so that all of the pieces are covered. Move the pot onto the stove, toss in the bay leaf, cover with a lid, and bring to a boil over moderate heat. Once boiling, cook with the lid off for 5 – 8 minutes, until the potatoes are fork-tender. Discard the bay leaf, drain, and let cool.
  2. Mean while, heat the oil in a large skillet over medium heat, and add in the shallots. Cook for about 3 minutes until somewhat translucent, and add in the garlic and ginger.
  3. After another minute or two has
    passed, incorporate all of the spices and lemon juice.
  4. Add in the the peas, and continue to stir the mixture for 5 minutes or so, until the peas have completely thawed.
  5. Toss the potatoes and dressing together in a large bowl, add salt and pepper to taste, and top with freshly chopped chives, if desired. Serve immediately if you want it warm, or let cool and chill thoroughly in an air-tight container.

Recommended Products

Please note that some of the links above are affiliate links, and at no additional cost to you, I will earn a commission if you decide to make a purchase after clicking through the link. I have experience with all of these companies and I recommend them because they are helpful and useful, not because of the small commissions I make if you decide to buy something through my links.

Nutrition Information:

Yield:

8

Serving Size:

1

Amount Per Serving: Calories: 226Total Fat: 9gSaturated Fat: 1gTrans Fat: 0gUnsaturated Fat: 8gCholesterol: 0mgSodium: 73mgCarbohydrates: 32gFiber: 5gSugar: 4gProtein: 5g

All nutritional information presented within this site are intended for informational purposes only. I am not a certified nutritionist and any nutritional information on BitterSweetBlog.com should only be used as a general guideline. This information is provided as a courtesy and there is no guarantee that the information will be completely accurate. Even though I try to provide accurate nutritional information to the best of my ability, these figures should still be considered estimates.

Oh, Baby!

Even if you’re thousands of miles away from New York City, or even on the other side of the world, I’m willing to bet that you’ve at least heard of Babycakes, the 100% vegan bakery that also caters to celiacs, diabetics, and above all else, people who really just want good cake. Seeming to be the answer to an unspoken question, this hot spot has been thriving since it opened in 2005, and is in fact doing so well that there are plans to open a west coast outpost in Los Angeles in the works. That’s not the most exciting morsel of news Erin McKenna, the proprietor and baker extraordinaire, has to share with her fans: No matter where you live, you can now enjoy all of those wonderful offerings found at Babycakes, thanks to their newly released cookbook that divulges all their secrets.

So, what’s the secret, you may wonder? I certainly did, and quickly flipping through the pages in a mad rush not unlike a sugar-high, my first thought was that it must be all that coconut oil. Yes, what was truly striking was how much coconut oil these recipes called for, and pretty much no other type of fat at all. That, plus the special gluten-free flour mixes, powdered soymilk, coconut powder, and so on make each recipe a fairly expensive venture. At the very least though, it certainly explains the relatively steep prices that the bakery charges. You’re definitely paying for quality here though; There are few ways around such expenses if you want to make a dessert without refined sugar or flour that’s still edible.

Immediately I was drawn to the cupcakes, the focal point of this little bakery, and especially the frosting. The book would have been worth buying if only for the frosting recipe, but unfortunately, I never could get it quite right. After turning into a lumpy, curdled mess, only an overnight stay in the freezer and then a vigorous second blending helped smooth the mixture out at all, but even then it was far too thin to consider piling on top of a cake. It pains me to think of the the whole 1 1/2 cups of coconut oil that was wasted.

At the very least, the Chocolate Cupcakes worked out just as written, rising just above the papers to achieve nice flat tops. Alone, they weren’t much to talk about, and did have a slight bean-y flavor thanks to the garfava flour, but overall were decent gluten-free cupcakes. Frosted, I’m sure these would be downright delicious.

While they may look like short cupcakes, these are actually gluten-free Blondies. Curious as to how such a creation might be possible, I couldn’t resist these round little sweets. Strongly flavored with vanilla, I loved the taste, but the texture left a bit to be desired. Much more like a moist cake than a blondie, I would simply call these tea cakes if serving them to an unsuspecting crowd. Unfortunately, these may not be for everyone, as my mom announced that her “favorite part about these were the chocolate chips” after trying one.

Going for one of the non-gluten-free recipes, the Raspberry Scones seemed promising. Very simple in construction and made with hearty spelt flour, these are something you don’t need to feel guilty about eating for breakfast. Again, they were much like tea cakes in texture, and not exactly what I would think of as a scone, but over all I truly enjoyed these little treats along with a strong cup of coffee in the morning.

If you’re looking for healthier, less-processed baked goods with classic flavors, or gluten-free desserts, this is the book for you. Despite having a fair share of hits and misses, it’s ultimately a beautiful cookbook with lots of helpful tips and ideas for creating your own sweet masterpieces, no matter your dietary restrictions. I’ll admit that it probably won’t be the first book I’ll turn to myself, but it will still hold a prominent place on my bookshelf.

Does any of that sound good to you? If so, then I’d love to give you a copy of the book as well! Just leave me a comment and tell me: What would be the first thing you’d like to make from it if you win? No double comments, please. The giveaway will close May 28 at midnight EST, and the winner will be announced the following day. Good luck!

Whoopie! School’s Over!

For someone who’s spent as much time driving to and from Massachusetts as myself, it’s surprising how little I’ve actually enjoyed the sights and sounds of Boston. Nonetheless, even as an outsider, the hustle and bustle of city life is somehow comforting, and after wandering the streets for just a night, I feel right at home. There will hardly be time to enjoy these surroundings as per usual, but this time, it’s for a very good reason indeed; Having traveled up for just the weekend, my family is now gathering to watch my sister graduate from her Boston-based university. A day that seems overdue and yet altogether too early, there’s so much to celebrate and so little time to pack in all this merriment. That’s why I started the party early, by presenting her with a sweet treat yesterday that absolutely screams “Boston,” both in name and heritage…

A Boston cream pie! But this was not any old yellow layer cake with custard filling- Try a Boston cream whoopie pie!

Converting this classic was a very simple task. Using the recipe from My Sweet Vegan as a starting point, additional flour replaced the cocoa, and an extra splash of vanilla joined the batter. For the filling, 3 tablespoons of custard powder added that familiar, rich pudding-like flavor, in addition to a creamy yellow color. Half of the cookies got a quick dip in ganache, were allowed to sit in a cool place until set, and then got paired up with a plain cookie and generous dollop of cream filling.

Here’s wishing that my sister’s life after graduation will be just as sweet, too.

Quick Cookie Fix

Just when it seems like life couldn’t possibly get any more hectic, there’s bound to be something extra to squeeze into that already overbooked schedule. At least that’s been my experience lately, splitting my time between recipe development, restaurant work, a photography internship, and of course, the blog.

Free time is but a fantasy, and I’m sure I’m not alone in feeling like there simply aren’t enough hours in a day to accomplish everything on that mile long “to-do” list. Thank goodness my time is occupied by things I love doing, and at the end of the day, there are still plenty of sweets and good eats in general left over to enjoy.

For the average 9 to 5 worker bee though, it’s no surprise that baking and cooking may fall by the wayside, not willing to spare those precious extra moments in the kitchen. And it’s really a shame, too, because many baked goods can be as quick and easy to make as another business appointment.

Peanut butter cookies are hardly innovative, but for those stressed out and simply craving a small morsel of comfort, these fit the bill perfectly. Calling for only three ordinary ingredients, I’m willing to bet that you already have everything you need for these babies on hand right now. As an added bonus, they’re naturally gluten-free, so they should appeal to a very wide crowd.

The potential variations are endless as well, so take this opportunity to exercise your creativity! Substitute any sort of nut butter (almond, hazelnut, cashew…) or add in a pinch of your favorite spice mixture (chai, five spice, apple pie…). Try using brown sugar instead of white, and go crazy with any sort of add-ins you fancy (chocolate chips, chopped nuts, coconut…).

Make this recipe your own and dress it up or down as you please. Most importantly though, just make it!

Yield: Makes 32 – 40 Little Cookies

1-2-3 Peanut Butter Cookies

1-2-3 Peanut Butter Cookies

Calling for only three ordinary ingredients, I’m willing to bet that you
already have everything you need for these babies on hand right now.
As an added bonus, they’re naturally gluten-free, so they should appeal
to a very wide crowd.

Prep Time 5 minutes
Cook Time 12 minutes
Additional Time 10 minutes
Total Time 27 minutes

Ingredients

  • 2 Cups Creamy Peanut Butter
  • 2 Cups Granulated Sugar
  • 1/4 Cup Whole Flax Seeds*

Instructions

  1. Preheat your oven to 350 degrees and line two baking sheets with parchment paper or sillicone baking mats.
  2. Grind the flax seeds in a spice or coffee grinder until they turn into a fine powder.   Transfer the powder into a large bowl, add in the peanut butter and sugar, and mix well.  Go ahead and mix like crazy, because there’s no gluten involved!  Just make sure they mixture is completely smooth and homogeneous.
  3. Scoop out about 2 teaspoon of batter per cookie, and space them approximately 1 inch apart on your prepared baking sheets.  Bake for 8 – 12 minutes, until very lightly browned around the edges.  Let the cookies cool for 10 minutes on the sheet before transferring them to a wire rack.  Take a moment and enjoy (they’re fabulous warm, too!)

Notes

*Using flaxseeds results in a somewhat crumbly cookie- Substituting an equal amount of chia seeds tends to hold the cookies together a bit better.  Both will work though!

Recommended Products

Please note that some of the links above are affiliate links, and at no additional cost to you, I will earn a commission if you decide to make a purchase after clicking through the link. I have experience with all of these companies and I recommend them because they are helpful and useful, not because of the small commissions I make if you decide to buy something through my links.

Nutrition Information:

Yield:

40

Serving Size:

1

Amount Per Serving: Calories: 120Total Fat: 7gSaturated Fat: 1gTrans Fat: 0gUnsaturated Fat: 5gCholesterol: 0mgSodium: 62mgCarbohydrates: 13gFiber: 1gSugar: 11gProtein: 3g

All nutritional information presented within this site are intended for informational purposes only. I am not a certified nutritionist and any nutritional information on BitterSweetBlog.com should only be used as a general guideline. This information is provided as a courtesy and there is no guarantee that the information will be completely accurate. Even though I try to provide accurate nutritional information to the best of my ability, these figures should still be considered estimations.