Batter Up

Dumping, stirring, scooping; it was a hard job. Such were the demands of a fledgling baker, still too young to read the recipe and too small to reach the kitchen counter without the assistance of a stepping stool. Measuring ingredients was a task just slightly more advanced than my skill level, but diligently, carefully, I took pre-portioned scoops of flour and sugar, adding them to the mixing bowl with earnest precision. At the age of five, it was impossible to understand the alchemy that would transform these raw, unappealing components into my favorite treat. The magic started well before the batter ever hit sheet trays, though. Even better than the finished chocolate chip cookies themselves would be the reward for all my painstaking efforts: a lick from the beater or bowl, still coated in unbaked dough.

Sweet Memories

Golden and slightly granular from the coarse brown sugar, those morsels were the ones I savored most. Though each piece of the appliance was thoroughly scraped before being surrendered for my inspection, more than enough remained to sate my sweet tooth. Looking back, those errant chunks and chips left behind within the tightly coiled metal whisk may not have been so accidental, after all.

A love for cookie dough was fostered at a very young age, from some of my very earliest memories of cooking with my mom. It seems to be a common thread across almost all demographics, even for those who learned to bake later in life, that raw cookie dough evokes a certain nostalgia. Unpretentious, undemanding, its inherent simplicity is all part of the appeal. Especially when the heat of the oven loses its appeal through the steamy summer months, it’s difficult to resist the urge to skip baking when you could just as easily dive in with a spoon.

Chill Out With Cookie Dough

If you can delay gratification just a little bit longer though, I have an even cooler way to appease those childhood memories. Cookie dough pudding pops, with all the familiar flavors in a creamy, frozen package, may become the new nostalgic sweet treat.
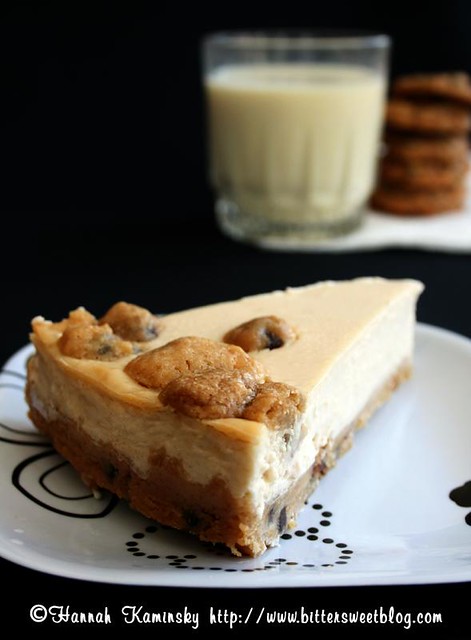
Better Than Baking

Toasting the flour brings out the subtle nutty, roasted flavors imparted by baking, without the same intense heat. The base is otherwise prepared the same as any other cooked custard, so if you can stir a pot, you can whip up this buttery brown sugar pudding in no time. In fact, you may be tempted to eat the plain pudding prior to its trip to the freezer, and I wouldn’t blame you. Just try to leave a little bit for the popsicles themselves; you’ll be grateful to have them on hand (and in hand) the next time a craving strikes.

Yield: Makes 6 - 12 Servings

Cookie Dough Pudding Pops

Cookie Dough Pudding Pops

Cookie dough pudding pops, with all the familiar flavors in a creamy, frozen package, may become your new nostalgic sweet treat.

Prep Time 5 minutes
Cook Time 15 minutes
Additional Time 3 hours
Total Time 5 minutes

Ingredients

  • 1/4 Cup All-Purpose Flour
  • 1 1/2 Cups Plain Non-Dairy Milk
  • 1/4 Cup Light Brown Sugar, Firmly Packed
  • 1 Tablespoon Vegan Butter, Melted
  • 1/4 Teaspoon Salt
  • 1 Teaspoon Vanilla Extract
  • 1/4 Cup Chocolate Chips

Instructions

  1. Begin by lightly toasting the flour in a dry skillet. Place the skillet over medium heat and continuously, gently stir the flour, until faintly golden brown all over. Slowly whisk in 1/2 cup of the non-dairy milk to form a thick paste, beating out any lumps before proceeding.
  2. Continue to add in the remaining non-dairy milk and whisk vigorously to smooth out the mixture. Incorporate the sugar, vegan butter, and salt, stirring well. Cook, stirring periodically, until bubbles break regularly on the surface and the liquid has thickened significantly.
  3. Turn off the heat, cool to room temperature, and then let rest in the fridge until thoroughly chilled. Stir in the vanilla and chocolate chips before transferring the mixture to popsicle molds. Place in the freezer and let rest until frozen; at least 3 hours.
  4. Yield will vary depending on the size of your molds.

Recommended Products

Please note that some of the links above are affiliate links, and at no additional cost to you, I will earn a commission if you decide to make a purchase after clicking through the link. I have experience with all of these companies and I recommend them because they are helpful and useful, not because of the small commissions I make if you decide to buy something through my links.

Nutrition Information:

Yield:

12

Serving Size:

1

Amount Per Serving: Calories: 66Total Fat: 3gSaturated Fat: 1gTrans Fat: 0gUnsaturated Fat: 1gCholesterol: 2mgSodium: 60mgCarbohydrates: 10gFiber: 0gSugar: 7gProtein: 1g

All nutritional information presented within this site are intended for informational purposes only. I am not a certified nutritionist and any nutritional information on BitterSweetBlog.com should only be used as a general guideline. This information is provided as a courtesy and there is no guarantee that the information will be completely accurate. Even though I try to provide accurate nutritional information to the best of my ability, these figures should still be considered estimations.


Messing with Perfection

If it’s not broken, don’t fix it.

Being so wholly resistant to change, it would seem completely the antithesis of my typical modus operandi to keep on tinkering and messing with a recipe so beloved as the chocolate chip cookie, and yet, I can’t keep my paws off of it.

Though friends and family would have me on criminal charges if I ever presented them with something other than my Bakery-Style Chocolate Chip Cookies, I still feel as though there’s so much more that this humble morsel can offer. But what on earth could be done to improve upon alleged perfection?

Well, how about adding another “perfect” dessert into the mix?

Like a cookie monster’s dream come true, the base of this cheesecake is not the same old graham cracker mush, but straight chocolate chip cookie dough, baked to crisp perfection on the bottom, yet still soft and chewy throughout. If there was ever a way to make something as untouchable as the classic CCC’s even better, I believe it would have to be this.

Yield: Makes 12 to 16 Servings

Chocolate Chip Cookie Dough Cheesecake

Chocolate Chip Cookie Dough Cheesecake

Like a cookie monster’s dream come true, the base of this cheesecake is not the same old graham cracker mush, but straight chocolate chip cookie dough, baked to crisp perfection on the bottom, yet still soft and chewy throughout.

Prep Time 30 minutes
Cook Time 1 hour
Additional Time 3 hours
Total Time 4 hours 30 minutes

Ingredients

Cookie Dough Crust and Topping:

  • 1/4 Cup Vegan Butter
  • 1/2 Cup Granulated Sugar
  • 1/2 Cup Dark Brown Sugar, Firmly Packed
  • 1 1/2 Cup All Purpose Flour
  • 1/4 Teaspoon Baking Powder
  • 1/4 Teaspoon Salt
  • 1/2 Teaspoon Vanilla Extract
  • 4 - 6 Tablespoons Plain Non-Dairy Milk
  • 1/3 Cup Mini Chocolate Chips, or Finely Chopped Semi-Sweet Chocolate

Cheesecake Filling:

  • 1 (12-Ounce) Package Extra-Firm Silken Tofu
  • 2 (8-Ounce) Packages Vegan Cream Cheese
  • 2/3 Cup Granulated Sugar
  • 2 Teaspoon Vanilla Extract
  • 1/8 Teaspoon Salt

Instructions

  1. Preheat your oven to 350 degrees and lightly grease and flour a 9-inch round springform pan.
  2. In your stand mixer, beat the vegan butter briefly to soften before adding in both sugars. Cream together thoroughly, until smooth, and then add in the flour, baking powder, and salt all at once. Mix on low speed to begin incorporating the dry goods, add in the vanilla, and slowly drizzle in the milk, one tablespoon at a time, just until the dough comes together. Continue mixing until homogeneous, if necessary, and finally work in the chocolate chips, beating just until the pieces are evenly distributed throughout. Measure out 1/2 cup of the dough and set this aside for the topping.
  3. Press the remainder of the dough into the bottom of your prepared springform pan, smoothing it out into an even layer, and bake for 15-18 minutes, until golden brown all over, and set aside to cool. Lower the oven to 325 degrees.
  4. Moving on to the filling, drain the tofu of any excess water and blend it in your food processor or blender until completely smooth. Add in the cream cheese and blend once more. Scrape down the sides and blend again, ensuring that no lumps remain. Incorporate the sugar, vanilla, and salt. Scrape down the sides once more, checking for any pockets of unincorporated ingredients. Blend thoroughly to create a homogeneous mixture, and pour it on top of your cookie crust. Tap the whole pan on the counter lightly, to even it out and eliminate any air bubbles. Smooth the top with your spatula.
  5. Take out your reserved cookie dough, and roll it into small, marble-sized balls. Drop the dough balls randomly around the edges of the cheesecake before transferring it to the oven. Bake for approximately 45 minutes, until the sides begin to pull away from the pan and the center still appears to be rather wobbly when tapped. Be careful not to over-bake, as it will become firmer as it cools.
  6. Let the cheesecake cool completely before moving it into the refrigerator, where I suggest you let it chill for at least 12 to 24 hours before serving. This will allow the flavors to fully develop and intensify. If you can’t wait, give it a minimum of 3 hours to reach the proper temperature.

Recommended Products

Please note that some of the links above are affiliate links, and at no additional cost to you, I will earn a commission if you decide to make a purchase after clicking through the link. I have experience with all of these companies and I recommend them because they are helpful and useful, not because of the small commissions I make if you decide to buy something through my links.

Nutrition Information:

Yield:

16

Serving Size:

1

Amount Per Serving: Calories: 191Total Fat: 6gSaturated Fat: 2gTrans Fat: 1gUnsaturated Fat: 4gCholesterol: 0mgSodium: 64mgCarbohydrates: 34gFiber: 1gSugar: 24gProtein: 2g

All nutritional information presented within this site are intended for informational purposes only. I am not a certified nutritionist and any nutritional information on BitterSweetBlog.com should only be used as a general guideline. This information is provided as a courtesy and there is no guarantee that the information will be completely accurate. Even though I try to provide accurate nutritional information to the best of my ability, these figures should still be considered estimations.