For many years, my family would threaten to skip the traditional spread for Thanksgiving in favor of plain pasta, sauce on the side. Gathering a dozen or more picky eaters around one table led to inevitable conflict and strife, because most people wouldn’t touch cranberry sauce with a three-foot spatula, green vegetables are akin to the devil for some, and even the omnivores generally turned up their noses at turkey. The only thing we could all agree on was the universal charm of good old fashioned noodles. We’re not talking about fancy herb-infused, handmade coils or twirls; no elaborate gluten-free blends. Just basic, white flour, dried pasta was always the first dish to empty at my grandma’s dinner table, no matter the intended accompaniment. In hindsight, I wish someone actually called that bluff and skipped the annual feast of discontent.

Realizing this concept in much grander fashion, a supposedly “rustic” starter of crispy butternut squash ravioli knocked me off my feet this Thanksgiving. Indeed, the ingredients are as ordinary as they come, but the time, effort, and love that goes into each individual pasta pillow is not. Longtime friend and erstwhile food blogger Jenn pulled out all the stops this year, balancing tradition with innovation, lavishly accommodating all guests with more food than a small mob could possibly consume in a week. It was that first dish that struck me as the very best though, if I had to choose, for finally hitting that satisfying promise made so many years ago.

Butternut is mashed into creamy submission and bundled up in homemade sheets of delicate dough, extraordinary for their apparent austerity yet rich depth of flavor. Owing to the skill of the cook, only some inconceivably magical process could possibly explain it otherwise. That, and a whole lot of vegan butter. Infused with a handful of bright, aromatic holy basil, sage might be more expected here but any tender herbs are welcome to this party.

In the spirit of giving, Jenn had the patience to not only swaddle those tender morsels of homemade butternut delight in handmade pasta to feed a crowd, but to endure the added chore of writing out every single step in painstaking detail on my behalf. At this point, I must acknowledge that I’m a terribly demanding guest.

Plain pasta, it is not; it’s something to be much more thankful for.
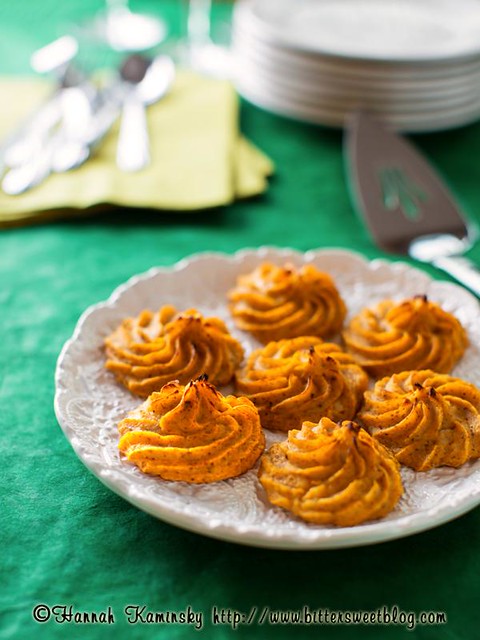
Butternut Squash Ravioli

Here’s a quick “no measure” recipe for a rustic ravioli dish that will make any occasion seem super special. You don’t need any special equipment — just a rolling pin though I prefer to use my Kitchen Aid pasta roller attachment to save time.
Ingredients
Pasta:
- 1 - 2 Cups Fine Semolina Flour
- 2 Tablespoons Extra Virgin Olive Oil
- 1 Teaspoon Salt
- Water, as Needed
Filling:
- 1 Butternut or Kabocha Squash, Roasted and Seeded
- Chopped Fresh Herbs (Such as Rosemary, Sage, Thyme, Oregano, etc), to Taste
- 1/4 Teaspoon Salt
- 1/8 Teaspoon Ground Nutmeg
Instructions
- To make the ravioli filling, mash the roasted butternut (or kabocha or pumpkin) and blend with the finely chopped herbs and spices. You don’t want this to be too fine a puree, you want to be able to drop it by the spoonful onto the pasta.
- To make the pasta, mix the dry ingredients and start adding the olive oil and mix well. Add cold or ice water in a thin stream, in small amounts, until the semolina starts getting a sandy texture. Check it periodically to see if you can clump it by smashing some inside the palm of your hand with your fist. If it is too tacky and wet, add more semolina. I prefer to use my stand mixer but you can do this by hand.
- Use a flexible spatula to scrape out of the bowl onto a work surface. Work it with your hands to press, squeeze and smush it together into a ball that starts to really stick together. You want to develop the gluten. Get out the rolling pin and work it flat, fold it and repeat.
- You can continue to work it with the rolling pin or you can get it thin enough (about 1/4″ for the widest setting on your pasta roller) to start putting through the pasta roller. I start out at “0” on my KA attachment and after a couple passes, narrow it a few more times until I get to 4 or 5.
- Get the pasta sheets as thin as you can without them being transparent, developing holes or tears when you try to stretch a bit (since you’ll be doing that to make the ravioli) but not so thick that you just have a super squishy dumpling.
- To shape the ravioli – you can do this with a water glass or biscuit cutter, a fancy ravioli cutter (I have individual cutters as well as a metal mold that is about as wide as the sheet of pasta.
- Get a small bowl of water and maybe a brush to keep at hand. Once you roll out your sheet of pasta — put it on the form or lightly mark it with your cutter, then use a measuring spoon to scoop a small ball of your cool filling onto the center of that mark.
- Dab a bit of water all around where the edge of the ravioli will be using the brush or your finger tips. Lay another sheet over top (or just fold a very long sheet) and then use your cutter (or rolling pin) to score the raviolis. Check to make sure the edges are sealed the first few times and then lay them out in a single layer on cutting board or cookie sheet to rest.
- Freezing the ravioli before you cook them yields better results. You can drop them into boiling water and then scoop them out and cover them with sauce, but for this thanksgiving treat — we browned some in vegan butter and crisped up the ravioli on both sides with some holy basil out of the garden, and then sprinkled with vegan parm.
Notes
If you have more pasta than energy to make ravioli — you can slice the sheets up into linguine or fettuccine, or make farfalle (butterfly or bowtie pasta) just by cutting squares and pinch in the middle. In all cases — leave pasta on a cookie sheet to rest and freeze or dry. You can also tightly wrap leftover pasta ball with plastic wrap and refrigerate to roll out later.
Recommended Products
Please note that some of the links above are affiliate links, and at no additional cost to you, I will earn a commission if you decide to make a purchase after clicking through the link. I have experience with all of these companies and I recommend them because they are helpful and useful, not because of the small commissions I make if you decide to buy something through my links.


Nutrition Information:
Yield:
50Serving Size:
1Amount Per Serving: Calories: 34Total Fat: 1gSaturated Fat: 0gTrans Fat: 0gUnsaturated Fat: 1gCholesterol: 0mgSodium: 53mgCarbohydrates: 6gFiber: 1gSugar: 0gProtein: 1g
All nutritional information presented within this site are intended for informational purposes only. I am not a certified nutritionist and any nutritional information on BitterSweetBlog.com should only be used as a general guideline. This information is provided as a courtesy and there is no guarantee that the information will be completely accurate. Even though I try to provide accurate nutritional information to the best of my ability, these figures should still be considered estimations.