I Have a Little Latke

Chanukah celebrations already well underway, we approach the sixth of eight nights this evening, bringing the holiday ever nearer to a close. Before many people have even had the chance to drag an evergreen tree into their living rooms or sing one carol, menorahs will be cooled and put away for another year. Crazy how fast it’s sped by this time around! I’m still struggling to keep up, injecting extra holiday cheer into what seem like otherwise ordinary winter days. That’s why I’d make the argument that it’s not at all too late for latkes- In fact, the early date of Chanukah means that these luscious potato pancakes should be fair game through the rest of the month, while everyone else is still celebrating Christmas, too.

Hopefully no one expects an average latke out of me by now. This year, my starchy spud cakes are thick, tender on the inside with a crisp exterior, perfumed throughout with rich Indian spices. Inspired by a favorite takeout dish, Bombay Aloo, this nontraditional take on the standard Chanukah staple will make it hard to go back to plain potatoes. Brightened with piquant jalapeno and a complex blend of garam masala, they’re just spicy enough to add excitement without setting the most timid of palates on fire. Pairing beautifully with the standard sour creme, you could also embrace the theme and switch out the typical applesauce for a sweet and savory apple chutney instead. Whatever you do, don’t let this opportunity to enjoy latkes pass you by.
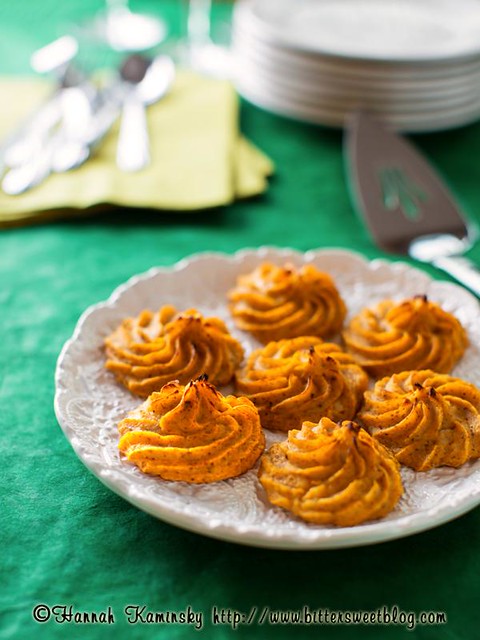
Yield: Makes 10 – 12 Thick Latkes, 16 – 18 Thinner, Smaller Latkes

Bombay Aloo Latkes

Bombay Aloo Latkes

Inspired by a favorite takeout dish, Bombay Aloo, this nontraditional take on the standard Chanukah staple will make it hard to go back to plain potatoes. Brightened with piquant jalapeno and a complex blend of garam masala, they’re just spicy enough to add excitement without setting the most timid of palates on fire.

Cook Time 20 minutes
Total Time 20 minutes

Ingredients

  • 2 Pounds Yukon Gold Potatoes, Peeled and Shredded
  • 1/2 Small Yellow Onion, Shredded
  • 1 Medium Fresh Jalapeno, Finely Minced
  • 1 1/2 Tablespoons Grated Fresh Ginger
  • 4 Cloves Garlic, Finely Minced
  • 1 1/4 Teaspoons Garam Masala
  • 1 Teaspoon Whole Cumin Seeds, Toasted
  • 3/4 Teaspoon Turmeric
  • 3/4 Teaspoon Salt
  • 2 Tablespoons Tomato Paste
  • 1 1/2 Teaspoons Lemon Juice
  • 1/4 Cup Potato Starch or Cornstarch
  • About 1/4 Cup Canola Oil, for Frying

Instructions

  1. After running both the potatoes and onion through the shredder (the food processor attachment is easiest, in my opinion) place both in a strainer and press down firmly, extracting as much liquid as possible. No need to get too crazy, but you should be able to remove about 1/3 cup starchy potato water. This will help the shreds hold together better while cooking.
  2. In a large bowl, mix together the minced jalapeno, ginger, garlic, spices, salt, and tomato paste until smooth. Add in the drained potatoes, drizzling them first with the lemon juice before tossing with the seasonings. Stir well to blend the paste throughout, getting in there and using your hands as needed. Sprinkle the cornstarch over last, tossing to coat and evenly distribute throughout the shreds.
  3. Heat about half of the oil in a medium-sized skillet over moderate heat. Once the oil is shimmering, it’s hot enough to start cooking up the latkes. For large, thick potato pancakes, I use about 1/3 cup of firmly packed shreds, using the measuring cup to mold them into an even round. Press the potato puck out lightly, so that it’s about 1 cm thick. For more dainty latkes, use closer to 1/4 cup of loosely packed shreds, flattening them out to about 1/2 cm thick. Cook no more than 3 latkes at one time, giving them all enough space to comfortable flip when the time comes.
  4. Allow the latkes to sizzle undisturbed for about 3 – 5 minutes on each side, flipping only once. When they’re golden brown on both sides, remove the latkes to paper towel-lined plates to drain. Add more oil to the skillet as needed for additional latkes. Serve immediately, or transfer to a wire rack and store in a 250 degree preheated oven until they’re all cooked and ready.

Recommended Products

Please note that some of the links above are affiliate links, and at no additional cost to you, I will earn a commission if you decide to make a purchase after clicking through the link. I have experience with all of these companies and I recommend them because they are helpful and useful, not because of the small commissions I make if you decide to buy something through my links.

Nutrition Information:

Yield:

18

Serving Size:

1

Amount Per Serving: Calories: 115Total Fat: 3gSaturated Fat: 0gTrans Fat: 0gUnsaturated Fat: 3gCholesterol: 0mgSodium: 97mgCarbohydrates: 20gFiber: 2gSugar: 1gProtein: 2g

All nutritional information presented within this site are intended for informational purposes only. I am not a certified nutritionist and any nutritional information on BitterSweetBlog.com should only be used as a general guideline. This information is provided as a courtesy and there is no guarantee that the information will be completely accurate. Even though I try to provide accurate nutritional information to the best of my ability, these figures should still be considered estimates.

Sweets for the Sweet

Some people on my holiday gift list are simply so sweet that they don’t need any added sugar. At least, that’s how I’ve come to interpret their need for lower glycemic and more health-supportive eats. Rather than going straight to savories, there’s still plenty of delicious middle ground to cover. Besides, chocolate is already well known to be health food, right?

Citrus Spice Truffles

Stevia is what turns these truffles into genuine candies, but it can take some play to get just the right level of sweetness. Tolerance varies by personal taste and brand, so be sure to sample and adjust your chocolate mixture (multiple times, if needed) before letting them set up.

Yield: Makes About 12 Truffles

Sugar-Free Citrus Spice Truffles

Sugar-Free Citrus Spice Truffles

These simple chocolate truffles, infused with bright orange zest and warm autumnal spices, are completely sugar-free, because everyone deserves a sweet treat.

Prep Time 5 minutes
Cook Time 5 minutes
Additional Time 30 minutes
Total Time 40 minutes

Ingredients

  • 1/4 Cup Refined Coconut Oil
  • 2/3 Cup Cocoa Powder
  • 1/2 Teaspoon Orange Zest
  • 1/2 Teaspoon Ground Cinnamon
  • 1/4 Teaspoon Ground Ginger
  • 1/8 Teaspoon Ground Cloves
  • 1/8 Teaspoon Salt
  • 1/4 – 1/2 Teaspoon Stevia Powder or 4 – 8 Drops Stevia Extract, to Taste
  • 1 Teaspoon Hot Water

Instructions

  1. This recipe is so simple, it barely needs written instructions. Start by melting your coconut oil down to liquid form.
  2. Meanwhile, whisk together all of the dry ingredients in a medium-sized bowl. Add in the coconut oil and stir the mixture until it’s a smooth, thick paste.
  3. Mix in the water so that it’s a looser, more pourable consistency. Carefully pour
    the liquid chocolate into a silicone candy mold.
  4. Place it in the fridge to set up; about 30 minutes. Pop the chocolates out and store either at room temperature (as long as the room is below 75 degrees) or back in the refrigerator.

Notes

I prefer to use refined coconut oil in this sort of application, because I don’t want these treats to have a particularly coconut-y flavor. If you don’t mind that added element, then by all means, go ahead and use virgin/unrefined coconut oil instead. It will work exactly the same way.

Recommended Products

Please note that some of the links above are affiliate links, and at no additional cost to you, I will earn a commission if you decide to make a purchase after clicking through the link. I have experience with all of these companies and I recommend them because they are helpful and useful, not because of the small commissions I make if you decide to buy something through my links.

Nutrition Information:

Yield:

12

Serving Size:

1

Amount Per Serving: Calories: 59Total Fat: 5gSaturated Fat: 4gTrans Fat: 0gUnsaturated Fat: 0gCholesterol: 0mgSodium: 21mgCarbohydrates: 5gFiber: 1gSugar: 0gProtein: 1g

All nutritional information presented within this site are intended for informational purposes only. I am not a certified nutritionist and any nutritional information on BitterSweetBlog.com should only be used as a general guideline. This information is provided as a courtesy and there is no guarantee that the information will be completely accurate. Even though I try to provide accurate nutritional information to the best of my ability, these figures should still be considered estimations.


Cookies, Cookies Everywhere…

But not a bite to eat. At least, that’s how it can feel like for someone with multiple food restrictions. Holiday parties bring with them countless treats, always including scores of baked morsels of all imaginable colors, sizes, and flavors. Being vegan no longer poses the same sort of dilemma to the savvy guest or host, but a vegan with allergies? Those can be treacherous waters to navigate, especially at a time of excess. While others feel free to indulge, that relaxed stance can make it even trickier to find foods unrefined or uncontaminated. Happily, every year brings new and increasingly delicious options, as awareness of alternative diets increases and bakers grow more experimental in the kitchen. For anyone still lacking in inspiration, the winter edition of Allergic Living comes in the nick of time, featuring two treats in particular that will wow eaters of all persuasions.

It’s always a pleasure to photograph Alisa Fleming‘s recipes, but her Hot Chocolate Cookies seemed to be made especially with me in mind. Throw marshmallows on top of anything and I’m all over it, but that deeply fudgy, chewy base that they sit upon has a lot to offer all by itself.

For a more dainty delight, the Vanilla-Chai Sandwich Cookies are just the ticket. With a shortbread-like texture so impossibly tender that each bite seems to melt in your mouth, few pairings of cookie and filling have been so successful in my experience. Each layer blends effortlessly into the next, while still providing enough textural contrast to keep things interesting. A handful of chai sandwiches would be the perfect ending to a big holiday feast, or wrapped up in pretty cellophane bags as gifts.

Whoever still says there aren’t delicious options for those with allergies just isn’t looking hard enough!

An Edible Mosaic

Cookbooks of every subject imaginable fill my constantly growing collection, an all-inclusive library of texts big and small. Predictably, the vast majority bear not even a passing mention to meat or dairy products, but it may come as a surprise that I don’t buy exclusively vegan cookbooks. In fact, part of the fun is finding something new that hasn’t yet been made in a vegan format, or provides new insight on why particular techniques evolved throughout the years. Particularly true of “authentic” recipes from other cultures, it really is much more effective (and delicious) to go straight to the source.

In the case of An Edible Mosaic, the source turns out to be close to my heart, if not in physical distance. Faith Gorsky, food blogger extraordinaire, talented photographer, and now accomplished cookbook author has been churning out mouth-watering dishes for years, sharing them with infectious enthusiasm. Showcasing all of her skills in one gorgeous hardcover text, it doesn’t take a cook or a foodie to appreciate the luscious photos within. Lavished with full-color images throughout, it would be a worthwhile investment if only as a coffee table book.

Happily, An Edible Mosaic is worth far more than that, as my first pick of Garlicky Potato Dip (Mutabbal Batata) (page 67) made readily apparent. Easily veganized by swapping in vegan yogurt, the whole recipe came together in a snap. Redolent of robust garlic essence, the thick potatoes make for a very rich, intense eating experience. Continuing to thicken as it cooled, and even more so after a rest in the fridge, it did seem like passing off mashed potatoes as a dip. A topping of spicy olive oil is a must for added contrast. Fresh herbs do wonders to brighten up the whole combination, although I did of course skip the cilantro in favor of parsley. While excelling in flavor, a bit more yogurt might improve the texture, helping to reinforce its place on the hors d’oeuvres tray rather than the dinner table.

Shawarma is one dish that is still hard to find without meat, and even harder to find done right. With Faith’s spicing guidelines in hand, the Spiced Shawarma Chicken Wraps (Shawarma Dajaj) (page 92) were the perfect opportunity to attempt making my own vegan version. Favoring rehydrated soy curls rather than poultry, the remaining procedure was just as simple as promised, yielding great rewards for such little effort. My only other alterations were the standard yogurt switch and baking for only 30 minutes, since the curls didn’t need to be “cooked through” the same way as meat would. Quite frankly, this was awesome. Killer spices, so much better than anything I had previously muddled together, make this dish a success no matter what you cook in them. Wraps aside, I would gladly devour those soy curls in salads, over rice, or by themselves. That marinade will go on to cover countless proteins to come, no doubt about it.

The Creamy Garlic Sauce (Toumieh) (page 24) served on the side, however, wasn’t entirely a resounding success. Granted, the Garlic Mayonnaise was recommended for serving alongside the wraps; veganizing the sauce was a more direct conversion, thus making it a better representative of the original recipe. Made for garlic lovers only, this will give you dragon’s breath of the best sort! Intense, ridiculously creamy and buttery, it is dangerously addictive. The trouble was in viscosity. Despite adding the optional [vegan] mayonnaise for thickness, the mixture just refused to bulk up, and furthermore insisted on separating after even a minute of inactivity. That sure didn’t stop me from relishing it as a salad dressing at many later meals, of course.

Lentil and Bulgur Pilaf with Caramelized Onions (Mujaddara Burghul) (page 82) is the world’s most perfect meal, by my uninformed estimation. Think about it- How many other dishes can boast such well-balanced nutrition, between the hearty whole grains and tender, protein-packed lentils? Top it all off with aromatic spices and irresistible caramelized onions, and you’ve got a dinner that’s both well rounded and unconditionally delicious. Everyone loves this classic, which makes its accidentally vegan composition that much more delightful. I’ve eaten many a bowl of mujaddara in my day, and this one definitely ranks up in the top three. Flavored mostly with warm, toasty cumin and a gentle accent of cinnamon, it works beautifully for lunch or dinner, hot or cold. This dish knows no boundaries.

Spices are of course so critical to Middle Eastern cooking, and Faith manages to make all of the combinations both approachable and accessible. My one main criticism, however, is the way that the main spice mixtures are laid out in the beginning of the book. I feel as though I’m constantly running around in circles trying to complete one mixture, as many redirect to other spice recipes, not once, not twice, but in a few cases up to four times. Personally, I wish they were all just written out in entirety, even if it would seem redundant.

All told, An Edible Mosaic is a cookbook that everyone can enjoy. Meaty or milky recipes can be modified with just a little creativity, so vegans need not avert their eyes. It’s a small challenge with a huge payoff, as you will surely be able to taste for yourself.

In the Eleventh Hour

Long before the word “vegetarian” had even entered my vocabulary or tofu occupied a place on my plate, Thanksgiving turkey nonetheless failed to excite any hunger in my young belly. I had yet to cultivate a true appreciation of any greener fare, and yet the side dishes were what always held the key to holiday dinner bliss. Anything starchy, buttery, and sweet was piled on with aplomb, moderation be damned. No matter how they were prepared, potatoes especially were key to a successful meal, often turning up in multiple forms to satisfy all family members. Mashed, roasted, scalloped, or fried, they all had equal billing on the menu, devoured far more enthusiastically than the obligatory bird.

Ironically, this habit has made the main dish beside the point, the backup singer rather than the star of the show. I’d gladly make space for another side dish or two than an extra serving of seitan roulade, no matter how delicious or painstakingly stuffed.

That’s why I have no compunctions about suggesting yet another starchy side, even in this eleventh hour of Thanksgiving prep. Inspired by my grandpa’s classic potato puffs, my rendition lightens the potato load with golden butternut puree. Pumpkin could effortlessly slip into that same role as well, if canned butternut is hard to come by. Crisp on the outside and creamy on the inside, these tiny mountains of mashed potatoes finally introduce the textural interest that plain old smashed spuds lack. Mercifully, their compact design allows for advance prep as well; bake them through as instructed, chill until dinner time, and them pop them back into a 400 degree oven for 5 – 10 minutes, just to heat them through.

Yield: Makes 1 1/2 – 2 Dozen Puffs

Butternut Potato Puffs

Butternut Potato Puffs

Inspired by my grandpa’s classic potato puffs, my rendition lightens the potato load with golden butternut puree. Pumpkin could effortlessly slip into that same role as well, if canned butternut is hard to come by. Crisp on the outside and creamy on the inside, these tiny mountains of mashed potatoes finally introduce the textural interest that plain old smashed spuds lack.

Prep Time 15 minutes
Cook Time 20 minutes
Additional Time 1 hour
Total Time 1 hour 35 minutes

Ingredients

  • 1 Pound Yukon Gold Potatoes, Peeled and Diced
  • 1 15-Ounce Can Butternut Squash Puree
  • 3 Tablespoons Non-Dairy Margarine or Coconut Oil, Melted
  • 1 Teaspoon Seasoned Salt
  • 1 Teaspoon Garlic Powder
  • 1 Teaspoon Onion Powder
  • 1/2 Teaspoon Poultry Seasoning
  • 1/4 Teaspoon Ground Black Pepper
  • 2 Tablespoons Cornstarch
  • 1 Tablespoon Whole Flax Seeds, Ground

Instructions

  1. Place your peeled and cut potatoes in a medium-sized pot of cool water. Set over moderate heat and bring up to a boil, reducing the heat to a lively simmer and cooking them until fork-tender. Drain thoroughly.
  2. Mash the potatoes as smoothly as possible before adding in all of the remaining ingredients, mashing and stirring to combine and beating out any lumps. Transfer the mashed mixture to a piping bag fitted with a large star tip and pipe the potatoes into small rosettes on two baking sheets lined with parchment paper or silpats. Aim for them to measure approximately 1 1/2 – 2 inches across the bottom, but there’s no need to break out a ruler here.
  3. Place the whole sheets in the freezer for about an hour, until solid. Once they’ve had ample time to chill out, preheat your oven to 450 degrees.
  4. Bake for 15 – 18 minutes, until golden brown all over. Serve right away while still hot.

Notes

To prepare in advance, bake through as instructed, chill until dinner time, and them pop them back into a 400 degree oven for 5 – 10 minutes, just to heat them through.

Recommended Products

Please note that some of the links above are affiliate links, and at no additional cost to you, I will earn a commission if you decide to make a purchase after clicking through the link. I have experience with all of these companies and I recommend them because they are helpful and useful, not because of the small commissions I make if you decide to buy something through my links.

Nutrition Information:

Yield:

24

Serving Size:

1

Amount Per Serving: Calories: 48Total Fat: 2gSaturated Fat: 1gTrans Fat: 0gUnsaturated Fat: 1gCholesterol: 0mgSodium: 66mgCarbohydrates: 7gFiber: 1gSugar: 1gProtein: 1g

All nutritional information presented within this site are intended for informational purposes only. I am not a certified nutritionist and any nutritional information on BitterSweetBlog.com should only be used as a general guideline. This information is provided as a courtesy and there is no guarantee that the information will be completely accurate. Even though I try to provide accurate nutritional information to the best of my ability, these figures should still be considered estimates.

Have a GRAIN Holiday!

Funny how the most open-ended requests are often the most challenging to fulfill. Narrow down the criteria to something incredibly specific, to what might be consider severely limited, even, and that’s where it’s easy to excel. The answer has almost been handed over, outlined in great detail about what it must or must not be, so it’s hard to go too far wrong. When tasked with creating something as vague as a “holiday dessert,” however, my mind goes blank. With endless paths to go down or ideas to explore, how can one determine what would be best?

Similarly, the concept of creating a recipe that simply must have flour as an ingredient left me just short of baffled. Flour, that ubiquitous ground wheat product, is so prevalent in this household that I’d swear I could sweep up all the dust on the shelves and bake a loaf of bread with it. After churning out hundreds of desserts over the past decade, it takes a deliberate effort not to start a recipe with flour.

That’s what made Hodgson Mill‘s call to arms equally enticing and perplexing. Mandating only that recipes include one or more of their whole grain flours, such an ambiguous lure proved impossible to resist. Surely I could make something with flour- What else do I do? And yet the concepts flew by, turning out only cakey, disappointing scones and a platter of cookies with an identity crisis, seeming more like little pies than discrete 2-bite confections. Given so much free rein, I didn’t quite know what to do with myself.

Until I focused my attention on chestnuts, that is. Gravely undervalued, these nuts have only a short window of availability, and rarely get the attention they deserve. Thinking more about the featured flavors than the construction allowed me to get around my baker’s block and create something truly prize-winning, if only amongst my taste testers.

Creating a hearty crumb that isn’t too dense, a blend of both whole wheat pastry flour and bread flour lends this sweet loaf a unique texture, slightly fluffier than your average pound cake. Chestnuts are blended to weave their unique essence into every bite, paired with sizable pieces for toothsome pops of nutty flavor. Though icing is typically an after though, something that could be listed as optional, this particular spicy topping is absolutely essential to contrast the hearty crumb. Don’t rush it either; the crunch and slight cooling sensation it provides after it hardens is critical to maximum enjoyment.

Yield: Makes 1 Loaf Cake; 8 – 10 Servings

Chestnut Pound Cake

Chestnut Pound Cake

Tender roasted chestnuts are woven into every bite of this wholesome cake. Warmly spiced icing set up to a crunchy contrast on top for maximum satisfaction.

Prep Time 20 minutes
Cook Time 1 hour
Additional Time 1 hour
Total Time 2 hours 20 minutes

Ingredients

Chestnut Pound Cake:

  • 1 Cup Whole Wheat Pastry Flour
  • 1/2 Cup Bread Flour
  • 1/2 Cup Confectioner’s Sugar
  • 1/4 Cup Cornstarch
  • 1/2 Teaspoon Baking Powder
  • 1/2 Teaspoon Baking Soda
  • 1/4 Teaspoon Salt
  • 1/2 Cup Olive Oil
  • 1/2 Cup Dark Brown Sugar, Firmly Packed
  • 10 Ounces (About 1 1/2 Cups) Whole Roasted and Shelled Chestnuts, Divided
  • 1/2 Cup Plain Non-Dairy Milk
  • 1 Teaspoon Ground Cinnamon
  • 1/2 Teaspoon Apple Cider Vinegar
  • 1 Teaspoon Vanilla Extract
  • 1/2 Teaspoon Almond Extract

Spiced Icing:

  • 1 Cup Confectioner’s Sugar
  • 1/2 Teaspoon Ground Cinnamon
  • 1/2 Teaspoon Ground Ginger
  • Pinch Ground Nutmeg
  • 1 – 2 Tablespoons Water

Instructions

  1. Preheat your oven to 350 degrees and lightly grease an 8 x 4-inch loaf pan.
    In a large bowl, sift together both flours along with the confectioner’s sugar, cornstarch, baking powder and soda, and salt. Roughly chop half of the chestnuts and toss them in, stirring to coat with flour to help prevent the pieces from all sinking to the bottom while baking. Set aside.
  2. Place the oil, brown sugar, and the remaining half of the chestnuts into the container of your blender or food processor and thoroughly puree. Pause to scrape down the sides if necessary, ensuring that everything is smoothly combined. Add in the “milk,” cinnamon, vinegar, vanilla, and almond extract, blending once more to incorporate.
  3. Pour the liquid mixture into the bowl of dry goods, and stir with a wide spatula just enough to bring the batter together. A few small lumps are far better than an overworked, tough cake. Pour the batter to your prepared pan and bake for 50 – 60 minutes, until amber brown all over an a toothpick inserted into the center pulls out cleanly. Let sit in the pan for about 5 minutes before transferring to a wire rack to cool completely.
  4. To prepare the icing, simply whisk together all of the ingredient, slowly adding water one drop at a time until it reaches your desired consistency. Drizzle generously over the top of the cake and allow it 1 – 2 hours to set and harden. Slice, serve, and enjoy!

Recommended Products

Please note that some of the links above are affiliate links, and at no additional cost to you, I will earn a commission if you decide to make a purchase after clicking through the link. I have experience with all of these companies and I recommend them because they are helpful and useful, not because of the small commissions I make if you decide to buy something through my links.

Nutrition Information:

Yield:

10

Serving Size:

1

Amount Per Serving: Calories: 400Total Fat: 13gSaturated Fat: 3gTrans Fat: 0gUnsaturated Fat: 10gCholesterol: 5mgSodium: 179mgCarbohydrates: 65gFiber: 4gSugar: 28gProtein: 6g

All nutritional information presented within this site are intended for informational purposes only. I am not a certified nutritionist and any nutritional information on BitterSweetBlog.com should only be used as a general guideline. This information is provided as a courtesy and there is no guarantee that the information will be completely accurate. Even though I try to provide accurate nutritional information to the best of my ability, these figures should still be considered estimations.