Back to Baking

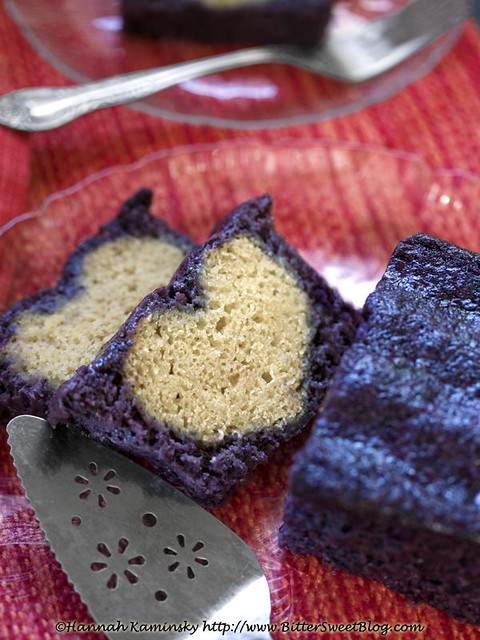
Is the coast clear yet? Has the holiday sugar overload and palate fatigue worn off? Have the chronic dieters lost their New Year’s resolve? I sure hope so, because I’ve got one killer dessert recipe burning a hole in my archives and I don’t think I can’t wait to share it much longer. Never mind the terrible picture, because this one has inner beauty hidden within every fold.

Singing out with the depth and soul that only dark, sticky molasses can bring to the table, these are not your average cinnamon rolls. Boldly spiced with ginger taking the clear lead, cinnamon is still invited to the party of course, but no longer the sole center of attention. It’s finally time for the rest of the well-seasoned entourage to shine, with all their lively, distinctive degrees of warmth on full display. Gingerbread may be most closely associated with the holidays, but if you ask me, that flavor bomb of a spice blend never goes out of style.

With all that goodness contained within the very foundation of the buns, what more could one possibly think of rolling up inside? All it takes is a simple combination of lemon and sugar to really push each yeasted spiral over the top. Brightening up breakfast, dessert, or snack time with a zesty contrast to those darker, richer tastes, any citrus fruit could make for an equally irresistible addition. Don’t stop at dabbling with just orange or lime zest- Tangerine, grapefruit, or even finely chopped kumquats sound pretty tempting, too.

Yield: Makes 9 – 12 Buns

Gingerbread Lemon Buns

Gingerbread Lemon Buns

Boldly spiced with ginger and cinnamon, warm molasses balances out the bright and zest lemon filling. Gingerbread may be most closely associated with the holidays, but this treat never goes out of style.

Prep Time 30 minutes
Cook Time 30 minutes
Additional Time 2 hours 3 seconds
Total Time 3 hours 3 seconds

Ingredients

Gingerbread Dough:

  • 1 Cup Plain Non-Dairy Milk
  • 1 Cube Fresh Yeast or 1 (1/4-Ounce) Packet Active Dry Yeast
  • 1/3 Cup Granulated Sugar
  • 1/4 Cup Olive Oil
  • 1/4 Cup Molasses
  • 2 Teaspoons Ground Ginger
  • 1 Teaspoon Ground Cinnamon
  • 1/2 Teaspoon Ground Cardamom
  • 1/4 Teaspoon Ground Cloves
  • 1/4 Teaspoon Ground Nutmeg
  • Pinch Freshly Cracked Black Pepper
  • 3 – 3 1/2 Cups All-Purpose flour
  • 1 Tablespoon Vital Wheat Gluten (Optional)
  • 1/2 Teaspoon Salt

Lemon-Sugar Filling:

  • 3 Tablespoons Vegan Butter, Melted
  • 1 Cup Granulated sugar
  • Zest of 1 Lemon

Instructions

  1. Heat the non-dairy milk of your choice in a microwave safe bowl for just a minute to warm, but do not bring it to a boil. Stir in the yeast and let is sit for about 5 minutes until frothy and active. Once re-awakened, pour the yeast mixture into your stand mixer, along with the sugar, oil, and molasses. Mix to combine.
  2. In a separate bowl, whisk together the first 3 cups of flour, spices, wheat gluten (if using), plus the salt. Make sure that all the dry goods are thoroughly distributed and there are no large pockets of unblended spices remaining. Add the dry ingredients into the bowl of wet, and beginning at the lowest speed, use the dough hook to slowly combine. Scrape down the sides of the bowl as needed to keep everything incorporated, until the dough forms a cohesive ball. If it still seems excessively wet, add up to 1/2 cup of flour.
  3. Let the mixer continue to knead the dough for about 10 minutes, until smooth and elastic. You could also knead it by hand; just take 15 minutes to do so instead. Place the dough into a lightly greased bowl, cover with plastic, and let rest in a warm area for about 1 1/2 hours, until doubled in size.
  4. Punch down the dough and turn it out on to a well-floured surface. Roll it out into a rectangle of about 14 x 18 inches. Brush generously with the melted vegan butter.
  5. Combine the sugar and zest in a small bowl before sprinkling the mixture evenly over the entire surface. Starting from one of the shorter ends, roll the rectangle up as tightly as possible, pinching the seam shut when you reach the other end.
  6. Use a very sharp knife to cut the roll into approximately 1 1/2-inch pieces. Fit them into a lightly grease 9 x 9-inch pan, spacing them as evenly as possible. Begin preheating your oven at this point to 350 degrees, and allow the rolls to rise for 45 – 60 minutes before sliding them into the hot oven.
  7. Bake for 25 – 35 minutes, until golden brown all over. Let cool for at least 15 minutes before digging in.

Recommended Products

Please note that some of the links above are affiliate links, and at no additional cost to you, I will earn a commission if you decide to make a purchase after clicking through the link. I have experience with all of these companies and I recommend them because they are helpful and useful, not because of the small commissions I make if you decide to buy something through my links.

Nutrition Information:

Yield:

12

Serving Size:

1

Amount Per Serving: Calories: 591Total Fat: 9gSaturated Fat: 2gTrans Fat: 1gUnsaturated Fat: 7gCholesterol: 2mgSodium: 104mgCarbohydrates: 114gFiber: 4gSugar: 29gProtein: 13g

All nutritional information presented within this site are intended for informational purposes only. I am not a certified nutritionist and any nutritional information on BitterSweetBlog.com should only be used as a general guideline. This information is provided as a courtesy and there is no guarantee that the information will be completely accurate. Even though I try to provide accurate nutritional information to the best of my ability, these figures should still be considered estimations.

The Heart of the Matter

Perhaps I’ve been looking at the Valentine’s Day ritual from the wrong perspective. Instead of recoiling at the sight of puffy pink hearts and greeting cards of dubious sincerity, focusing on the abundance of new opportunities to indulge my sweet tooth would surely help the occasion pass with less pain.

Chocolate truffles and ornate confections are the “traditional” treats associated with this annual love-fest, but my own cravings have taken a turn for the lighter and fresher this year. Wild Frozen Blueberries never go out of style, especially in Hawaii where discovering fresh berries is about as likely as spying Menehune in Waikiki. Postage stamp-sized freezer space be damned, these tiny blue gems were a necessity to squeeze in. Fully stocked on this taste of home, it was a natural decision to go blue this holiday.

Unimpressive, even homely at first glance, the true beauty of this festive cake is revealed within the very first slice. Concealed beneath an ocean of deep blue batter lies heart of gold- Well, golden vanilla pound cake, at least! Talk about a sweet surprise.

Let the lucky recipient believe that it’s a testament to the power of love, or perhaps some wild baking alchemy, but the truth is grounded in good old-fashioned advanced planning. Little more work than crafting two standard, separate cakes, some clever cookie cutter usage and a heaping cup of patience are the only secret ingredients here.

Proving the power of Frozen Wild Blueberries in every moist, tender forkful, what appears to be a modest measurement goes a very long way, translating into volumes of robust berry flavor throughout. Wrapping around the heart-y core in a gentle embrace, the two components meld harmoniously, while nonetheless remaining distinct. They’re a perfect couple if I ever did see one.

Even if there isn’t a special someone to indulge this Valentine’s Day, don’t hide your heart away! Just cut yourself a thick slice of cake and taste the love that only Wild Blueberries have to share, no strings attached.

Yield: Makes 10 – 12 Servings

Hidden Heart Wild Blueberry Cake

Hidden Heart Wild Blueberry Cake

Though unimpressive, at first glance, the true beauty of this blueberry cake is revealed within the very first slice. Concealed beneath an ocean of deep blue batter lies heart of gold- Golden vanilla pound cake, at least!

Ingredients

Vanilla Poud Cake:

  • 1 3/4 Cups All Purpose Flour
  • 1 Cup Granulated Sugar
  • 1 Teaspoon Baking Powder
  • 1/2 Teaspoon Baking Soda
  • 1/2 Teaspoon Salt
  • 1 Cup Vanilla Non-Dairy Milk
  • 1 Tablespoon Lemon Juice
  • 1/4 Cup Olive Oil
  • 2 Tablespoons Vanilla Extract

Wild Blueberry Cake:

  • 1 Cup Frozen Wild Blueberries, Thawed
  • 1/3 Cup Water
  • 1/4 Cup Lemon Juice
  • 1/4 Cup Olive Oil
  • 1/2 Teaspoon Vanilla Extract
  • 1 Cup Granulated Sugar
  • 2 Cups All Purpose Flour
  • 1 1/4 Teaspoons Baking Powder
  • 1/2 Teaspoon Baking Soda
  • 1/2 Teaspoon Salt

Instructions

  1. Preheat your oven to 350 degrees and lightly grease an 8 x 4-inch loaf pan.
  2. Beginning with the vanilla cake, whisk together the flour, sugar, baking powder and soda, and salt in a large bowl. Once the dry goods are well-distributed, turn your attention to the wet ingredients. In a separate bowl, combine the non-dairy milk of your choice with the lemon juice, allowing it to sit for about 5 minutes to curdle slightly. Add in the oil and vanilla, stir thoroughly, and introduce this liquid mixture to the bowl of dry ingredients.
  3. Mix gently with a wide spatula, stirring just enough to bring the batter together with few remaining lumps. Transfer into your prepared loaf pan, smooth out the top, and slide it into the center of your oven. Bake for 50 – 55 minutes, until lightly golden brown all over and a toothpick inserted into the center comes out cleanly. Let cool completely and chill for at least 1 hour before proceeding.
  4. Once your cake is nice and cold all the way through, use a very sharp serrated knife to slice it into 1-inch thick slabs. Take a large heart-shaped cookie cutter that fits within the confines of the slices and punch out your heart shapes; cover with plastic wrap to prevent them from drying out and set aside.
  5. Preheat your oven to 350 degrees once more and lightly grease another 8 x 4-inch loaf pan.
  6. Moving on to the Wild Blueberry batter, toss the berries into your blender or food processor, and thoroughly puree. Slowly drizzle in the water, lemon juice, oil, and vanilla to incorporate. Add in the sugar into the machine last, and continue blending until completely smooth, with just a few visible seeds remaining.
  7. In a separate bowl, mix the flour and baking powder, soda, and salt.  Just as before, pour the liquid mixture into the bowl of dry goods, stirring to combine with as few strokes as possible.
  8. Pour a thin layer of the batter into the prepared loaf pan, spreading it out smoothly so that it evenly reaches about ½ – ¾ of a centimeter all the way across the bottom. Retrieve your heart-shaped vanilla cake cut-outs, and line them up in a row along the center. Naturally, they’ll fit if you can arrange them in the same order as they were cut, but it will work just as beautifully if they’ve gotten mixed up too. Pour the remainder of the blue batter around the sides and over the tops of the hearts, being careful to fill up any crevices.
  9. Tap the pan firmly but gently on the counter to release any air bubbles that may disrupt the pattern. It’s likely that you’ll end up with some extra batter that won’t fit into the pan; bake it off separately as cupcakes or mini-loaves to enjoy later!
  10. Carefully slide the loaf pan into the oven and bake for 30 – 45 minutes, until a toothpick inserted into one of the blue sides pulls out cleanly. Don’t test for doneness in the center; of course the vanilla cake will be done, since it was already well-baked to begin with.
  11. Let cool completely before slicing and serving.

Recommended Products

Please note that some of the links above are affiliate links, and at no additional cost to you, I will earn a commission if you decide to make a purchase after clicking through the link. I have experience with all of these companies and I recommend them because they are helpful and useful, not because of the small commissions I make if you decide to buy something through my links.

Nutrition Information:

Yield:

12

Serving Size:

1

Amount Per Serving: Calories: 426Total Fat: 10gSaturated Fat: 2gTrans Fat: 0gUnsaturated Fat: 8gCholesterol: 2mgSodium: 387mgCarbohydrates: 69gFiber: 2gSugar: 37gProtein: 5g

All nutritional information presented within this site are intended for informational purposes only. I am not a certified nutritionist and any nutritional information on BitterSweetBlog.com should only be used as a general guideline. This information is provided as a courtesy and there is no guarantee that the information will be completely accurate. Even though I try to provide accurate nutritional information to the best of my ability, these figures should still be considered estimations.


Savoring Chocolate

Chocolate goes with everything, or so the enthusiasts proclaim, and for once I’m not here to argue. Though not a rabid chocoholic myself, a square or two of good dark chocolate is frequently the emergency fuel of choice, staving off everything from common hunger pangs to emotional flights of fancy. No stranger to the great range of flavors that can be coaxed from the humble cacao, my greatest disappointment is that fewer feel the need to explore beyond the most commonly accepted flavor pairings. More adventurous confections are beginning to emerge, giving rise to bars dusted with curry, sprinkled with popped amaranth, or blended with beer, but all of these treats still land firmly on the dessert menu. Enough with the candies and confections, just for once! I would challenge those who see chocolate only as a source of sweet gratification to take a walk on the savory side.

To call them “cookies” may be a bit deceptive, but their construction has much more in common with your standard shortbread than any cracker or chip I’ve ever known. Ultra-dark, dry, and slightly bitter chocolate chunks put to rest any preconceived notions of classic chewy chocolate chip cookies– Switching up cacao percentages alone makes an incredible world of difference! Of course, such a small adjustment didn’t satisfy my craving, which is where the unconventional addition of oil-cured olives comes into play. Yes, you heard right: Olives. Briny, rich with oil, vaguely fruity, and very concentrated in their inherent olive goodness thanks to the slow drying process, this salty addition serves to brighten the chocolate while adding a surprising pop of flavor. Catching eaters off-guard at first bite, it won’t be a taste for everyone, but a delight for adventurous eaters seeking something new.

Best served as an appetizer or snack, these delicate cookies shine their brightest when paired with a glass of dry red wine and an equally salty olive-infused hummus on the side. Don’t be afraid to really drive the theme home with a robust tapenade. Trust me, that intense dark chocolate can stand up to anything you throw at it. The saying really is true; chocolate goes with everything, or perhaps more accurately, everything goes with chocolate.

Yield: Makes 1 1/2 – 2 Dozen Cookies

Savory Chocolate-Olive Cookies

Savory Chocolate-Olive Cookies

Briny, rich with oil, vaguely fruity, briny olives brighten the chocolate in these buttery treats while adding a surprising pop of flavor.

Ingredients

  • 1/2 Cup Vegan Butter
  • 1/4 Cup Granulated Sugar
  • 2 Cups All Purpose Flour
  • 2 Tablespoons Cornstarch
  • 1/2 Teaspoon Dried Tarragon
  • 1/2 Teaspoon Ground Black Pepper
  • 1/4 Teaspoon Salt
  • 1/2 Cup Oil-Cured Olives, Pitted and Chopped
  • 2.5 Ounces 90% Cacao Dark Chocolate, Chopped
  • 2 Tablespoons Extra-Virgin Olive Oil

Instructions

  1. Fit your stand mixer with the paddle attachment and thoroughly cream together the butter and sugar, until the mixture is homogeneous. In a separate bowl, combine the flour, cornstarch, tarragon, pepper, and salt, making sure that all of the dry goods are evenly distributed throughout. Add in the chopped olives and chocolate, tossing gently to coat all of the pieces with flour. Break up any clumps of olives that may remain sticking together so that they’re equally blended throughout each finished cookie. Starting the mixer back up on the lowest setting, slowly incorporate the dry goods in two additions, alternating with the olive oil, until all the remaining ingredients are used.
  2. The dough should be just moist enough to stick together in a coherent ball when pressed; don’t be tempted to incorporate extra liquid! Gather it all up and form it into a log about 6 – 8 inches long. You can choose to either keep your cookies rounded or square off the edges by gently dropping the log on the counter at regular intervals. It’s merely a stylistic choice, so feel free to play around with it. Once shaped as desired, wrap the dough log in plastic and place it in your freezer. Allow at least 2 hours for it to chill, or store for up to 3 months before baking.
  3. Preheat your oven to 325 degrees and line two baking sheets with silicone baking mats or pieces of parchment paper.
  4. Unwrap the chilled dough, handling it as little as possible to prevent it from warming up, and use a very sharp knife to cut it into slices approximately 1/4 inch in thickness. (The cookies pictured above are admittedly a bit too thick- Don’t go too chunky here or they will be very dry and cloying!) Lay the cookies out with about 1/2 inch in between them on your prepared sheets, and bake for 20 – 25 minutes, rotating the pans halfway through, until lightly golden brown.
  5. Let cool completely on the sheets before enjoying or storing in an air-tight container.

Nutrition Information:

Yield:

24

Serving Size:

1

Amount Per Serving: Calories: 153Total Fat: 10gSaturated Fat: 3gTrans Fat: 0gUnsaturated Fat: 6gCholesterol: 10mgSodium: 54mgCarbohydrates: 13gFiber: 1gSugar: 3gProtein: 2g

All nutritional information presented within this site are intended for informational purposes only. I am not a certified nutritionist and any nutritional information on BitterSweetBlog.com should only be used as a general guideline. This information is provided as a courtesy and there is no guarantee that the information will be completely accurate. Even though I try to provide accurate nutritional information to the best of my ability, these figures should still be considered estimates.

Creature Comforts

Undefinable yet immediately recognizable, there’s no sense in wasting many words attempting to define it; it’s a sentiment communicated through taste instead of language. Comfort food is a concept that transcends all cultural and temporal boundaries, no matter what final form it may take. Seasonings change and dishes vary, but the ability to instantly transport an eater to a happier place, at least for the duration of a meal, that remains the same, from the first bite to the last crumb. That’s why it’s never a bad time to delve into Allison Rivers Samson‘s lovingly crafted ebook, Comfortably Yum. A short but sweet compilation of her ten most soul-soothing recipes, Allison manages to cover a wealth of common cravings without wasting a single digital page.

Incredibly, for a category traditionally laden with fats, sugars, and often processed foods, Comfortably Yum avoids those dietary pitfalls by making every recipe gluten-free or adaptable, and only employing the use of coconut sugar as a sweetener.

Call me biased, but I already knew I was in for a treat with this ebook, since I had previously made and photographed Allison’s fresh take on Caesar Salad for VegNews Magazine two years ago. Yes, salad can be comfort food too, and it’s a refreshing to find someone else who agrees! This rendition on the classic leafy blend comes the closest to my childhood memories, skipping all the fussy fare and focusing in on crisp, garlicky croutons and a creamy dressing, boasting a gently oceanic flavor thanks to the addition of briny capers and nori. Who needs anchovy paste when you have such excellent plant-based alternatives?

Vegan Egg Salad is a classic recipe that every cruelty-free cook should have in their arsenal, and this tofu-based interpretation makes a strong case for taking that spot of honor. Naturally, preparation couldn’t be simpler; an effortless dump-and-stir affair brings together a rich blend of vegan mayonnaise, kala namak, and basic seasonings to coat crumbled bean curd and crunchy cubes of celery. The powerfully eggy flavor borne of that combination is unreal, rivaling the aroma of freshly cracked hard boiled eggs. Served on crackers or between bread, I daresay that only the most astute omnivores would even detect a difference.

Finally, for dessert, I couldn’t resist the siren song of the Chocolate Salted-Caramel Pudding Parfaits. Regrettably, perhaps out of impatience or a lack of finesse, mine refused to form the neat, even layers as photographed in the ebook, but none of that mattered when it came time to dig in. Swirls of coconut sugar custard interlaced with cocoa pudding, creating a flavor sensation sure to delight anyone with a sweet tooth. For anyone who fears traditional caramel-making, take heart: The coconut sugar does all the work for you here, bearing a naturally toasted flavor similar to that of burnt white sugar.

Whether you’re staring down a string of snowy days in the forecast or simply want a taste of comfort any day of the week, Comfortably Yum has got your cravings covered. In this winter of particular extremes, Allison has very generously offered to spread the warm, cozy feelings and wants to share a free copy of her ebook with one lucky winner! To enter, leave a comment on this post and tell me about which recipe you’d most like to recreate first. (You can see the full listing if you scroll down here.) Speak up before February 2nd, midnight EST, and I’ll chose a lucky recipient shortly thereafter.

UPDATE: Always ready and willing to help, the random number generator has spoken, and has proclaimed that the winner should be…

The owner of comment #25: greatveganexpectations!

There’s a golden lining to this contest, even if it wasn’t your lucky day. Allison was so delighted by the positive response that she has very kindly extended a $5-off promotion for anyone who purchases her ebook! Don’t wait too long to secure your copy, because this is a limited-time offer. Enter the code “HBCY24” from now until February 10th to make the most of this delicious opportunity.

In Good Spirits

Infused with a generous pour of Cabernet from the start and doused with an additional slug of brown sugar-enriched syrup, soaking each nook and cranny with a strong dose of sweet red wine, this cake knows how to party. Perhaps the holidays would have been easier to manage had we all been so thoroughly sloshed.

Studded with large pieces of roasted chestnuts, it’s a limited time treat ideal for these winter months. Though the jubilant days of Christmas and New Year’s feel like a lifetime ago already, surely there are plenty of other occasions worth celebrating. Even a good old fashioned snow day could be an excellent excuse to batten down the hatches and drown your sorrows not in a stiff drink, but a strong slice of this tender cake. It’s perfectly acceptable to disregard the notion of “happy hour” if it’s just a snack, midday, mid-morning, or whenever the craving strikes- Right?

Plus, purely by accident, the formula became much leaner than intended by the clumsy omission of any added fat, so you can absolutely pass this off as resolution-friendly diet fare. Happily, the texture doesn’t suffer one bit without the oil; I would have never realized my mistake if not for my recipe notes. I guess it’s obvious that not all of the wine made it into the cake first.

Yield: Makes 8 – 10 Servings

Tispy Chestnut Cake

Tispy Chestnut Cake

Infused with a generous pour of Cabernet from the start and doused with an additional slug of brown sugar-enriched syrup, soaking each nook and cranny with a strong dose of sweet red wine, this cake knows how to party. Studded with large pieces of roasted chestnuts, it’s a limited time treat ideal for these winter months.

Ingredients

Tipsy Chestnut Cake:

  • 2 Cups All-Purpose Flour
  • 3/4 Cup Granulated Sugar
  • 1 Teaspoon Five-Spice Powder
  • 1 Teaspoon Baking Powder
  • 3/4 Teaspoon Baking Soda
  • 1/2 Teaspoon Salt
  • 2 Cups (10 Ounces) Very Coarsely Chopped Roasted Chestnuts
  • 3/4 Cup Dry Red Wine (Such as Cabernet Sauvignon, Merlot, or Pinot Noir)
  • 1/2 Cup Unsweetened Applesauce
  • 1 Teaspoon Vanilla Extract

Crimson Wine Syrup:

  • 1/4 Cup Dark Brown Sugar, Firmly Packed
  • 1/3 Cup Dry Red Wine
  • Pinch Salt

Instructions

  1. Preheat your oven to 325 degrees and lightly grease and flour an 8 x 4-inch loaf pan.
  2. In a large bowl, whisk together the flour, sugar, five-spice powder, baking powder and soda, and salt. Make sure all of the ingredients are thoroughly combined and distributed throughout before adding in the chopped chestnuts. Toss to coat with the flour to prevent the pieces from sinking to the bottom of you cake while baking, and set aside.
  3. Mix the red wine, applesauce, and vanilla in a separate bowl before introducing those wet goods into the bowl of dry goods. Use a wide spatula to bring the two together, stirring just enough to combine without over-mixing. It’s perfectly fine to leave a few lumps remaining.
  4. Transfer the batter to your prepared loaf pan and smooth out the top before sliding it into the center of your oven. Bake for 55 – 60 minutes, until deeply browned on top and a toothpick inserted into the center comes out clean.
  5. While the cake is baking, prepare the red wine syrup by simply adding the wine, brown sugar, and salt into a small saucepan set over medium heat. Cook just until the sugar has dissolved if you’d like the wine to retain a bit of its alcoholic bite, or allow it to simmer for 5 – 10 minutes to lessen its boozy punch.
  6. Once the cake is baked but still warm, poke it numerous times with a skewer to allow the syrup to penetrate deep into the crumb, and pour the hot syrup all over. Let cool completely before removing from the pan. Although the cake tastes best the next day after soaking a bit, it’s quite delicious to slice and serve as soon as it’s cool.

Recommended Products

Please note that some of the links above are affiliate links, and at no additional cost to you, I will earn a commission if you decide to make a purchase after clicking through the link. I have experience with all of these companies and I recommend them because they are helpful and useful, not because of the small commissions I make if you decide to buy something through my links.

Nutrition Information:

Yield:

10

Serving Size:

1

Amount Per Serving: Calories: 216Total Fat: 0gSaturated Fat: 0gTrans Fat: 0gUnsaturated Fat: 0gCholesterol: 0mgSodium: 266mgCarbohydrates: 45gFiber: 1gSugar: 22gProtein: 3g

All nutritional information presented within this site are intended for informational purposes only. I am not a certified nutritionist and any nutritional information on BitterSweetBlog.com should only be used as a general guideline. This information is provided as a courtesy and there is no guarantee that the information will be completely accurate. Even though I try to provide accurate nutritional information to the best of my ability, these figures should still be considered estimations.

Oh, My Darling Clementines

Like clockwork, I’m right back at my usual tricks again, infusing every morsel that crosses my path with a bit of edible sunshine while the real thing plays hard to get. Grapefruits, oranges, lemons, and limes are always close at hand, spilling out of the refrigerated fruit bin and lining the kitchen counters, decorating these dark spaces with a cheerful spray of neon colors. Their natural luminescence does wonders to lift spirits through the most gloomy of days, but it’s truly the bold, bright, astringent flavors that sustain me through winter. This year, I’ve added a new comer to that line-up of faithful fruity regulars: The petite yet powerful clementine.

Luck was on my side this season, as the kind folks representing Cuties Clementines were generous enough to ship an entire crate full of these glowing orange orbs straight to my door. Not to be overly dramatic, but what a revelation! Gone are the days of meticulously picking at the stringy pith of oranges before the segments become edible. The skin practically falls off of these juicy half-moons, nary a seed in sight. No muss, no fuss, they’re the ultimate winter pick-me-up. Naturally, they’re a boon to desserts and other treats as well.

Citrus supremes are a beautiful addition to all sorts of desserts, but they’re such a pain to prepare. Thanks to a combination of dull knifes and insufficient handiwork, mine always end up ragged, sad little slivers of their former selves; certainly nothing to crown a grand finale with. Clementines, on the other hand, pop out of their peels ready to use, unblemished and the ideal size to toss into just about any dish. Simply layering them with plain old soy yogurt, sliced almonds, and berries elevated my boring lunchtime routine into something worth remembering.

Bursting with flavor, sweeter and more mellow than an orange but still plenty punchy, clementines sounded like the ideal pairing with matcha. Cutting through the bitter powdered tea and balancing out the whole dessert, segments top chewy tapioca pearls, cradled in the easiest mini tart shell you’ll ever slap together. No need to break out the rolling pin, this crust is merely pressed into the pans and won’t slip or slide under the heat of the oven, standing tall without the need for pie weights.

Winter, you have officially met your match; the bright taste of these Cuties makes a day without sunshine no big deal.

Yield: Makes 10 – 12 Tartlets

Clementine and Matcha Tapioca Tartlets

Clementine and Matcha Tapioca Tartlets

Bursting with flavor, sweeter and more mellow than an orange but still plenty punchy, clementines sounded like the ideal pairing with matcha. Cutting through the bitter powdered tea and balancing out the whole dessert, segments top chewy tapioca pearls, cradled in the easiest mini tart shell you’ll ever slap together. No need to break out the rolling pin, this crust is merely pressed into the pans and won’t slip or slide under the heat of the oven, standing tall without the need for pie weights.

Prep Time 30 minutes
Cook Time 25 minutes
Additional Time 4 hours
Total Time 4 hours 55 minutes

Ingredients

Press-In-Pan Olive Oil Pastry Crust:

  • 1 1/2 Cups All Purpose Flour
  • 1/4 Cup Granulated Sugar
  • 1/2 Teaspoon Salt
  • 1/2 Cup Olive Oil
  • 1 Tablespoon Lemon Juice
  • 1 – 2 Tablespoons Water

Matcha Tapioca:

  • 1/2 Cup Small Tapioca Pearls
  • 2 1/2 Cups Vanilla Coconut Milk Beverage or Plain Non-Dairy Milk
  • 1/3 Cup Granulated Sugar
  • 1 Tablespoon Cornstarch
  • 1 Tablespoon Arrowroot Powder
  • 2Teaspoons Matcha Powder
  • 1/4 Teaspoon Salt
  • 2 Tablespoons Vegan Butter
  • 1 Teaspoon Vanilla Extract

To Finish:

  • 4 – 5 Clementines, Peeled and Segmented
  • Fresh Mint Leaves (Optional)

Instructions

  1. Preheat your oven to 375 degrees and lightly grease 10 – 12 (3-inch) mini tart molds.
  2. To make the crust, mix together the flour, sugar, and salt in a large bowl. Add in the olive oil and lemon juice, stirring thoroughly to incorporate. Drizzle in the water very slowly, adding just enough to bring the dough together without making it wet or sticky. Break off about 2 – 3 tablespoons of dough for each mini tart mold and press it evenly across the bottoms and up the sides of the forms. Make sure there aren’t especially thick edges left around the base so that it all cooks at the same rate.
  3. Bake for 10 – 15 minutes, turning the pan around halfway through the process to ensure even baking, until golden brown all over. Let cool completely before popping the shells out of their metal molds.
  4. For the tapioca, begin by pouring 2 cups of very hot water over the pearls and allowing them to soak for at least 2 – 3 hours. This will soften them and prevent the centers from remaining after cooking. Rinse with cold water and thoroughly drain.
  5. Place the soaked pearls in a medium saucepan along with the non-dairy milk. Whisk together the sugar, matcha, cornstarch, and arrowroot in a separate bowl to break up any and all clumps of the tea powder before adding it into the pot as well. Set over medium heat on the stove and allow the mixture to come up to a boil, whisking periodically and being sure to scrape along the sides and bottom to prevent anything from sticking and burning. Once it comes bubbles vigorously for a full minute, turn off the heat before throwing in the vegan butter and vanilla extract. Stir until the butter has completely melted and distribute the hot pudding between the baked mini tart shells, filling them to the top.
  6. Allow the tapioca to fully cool before topping with clementine segments and a few mint leaves, if desired. Serve at room temperature or chill for 2 hours to enjoy them cold.

Recommended Products

Please note that some of the links above are affiliate links, and at no additional cost to you, I will earn a commission if you decide to make a purchase after clicking through the link. I have experience with all of these companies and I recommend them because they are helpful and useful, not because of the small commissions I make if you decide to buy something through my links.

Nutrition Information:

Yield:

12

Serving Size:

1

Amount Per Serving: Calories: 260Total Fat: 13gSaturated Fat: 3gTrans Fat: 0gUnsaturated Fat: 9gCholesterol: 2mgSodium: 146mgCarbohydrates: 35gFiber: 1gSugar: 16gProtein: 3g

All nutritional information presented within this site are intended for informational purposes only. I am not a certified nutritionist and any nutritional information on BitterSweetBlog.com should only be used as a general guideline. This information is provided as a courtesy and there is no guarantee that the information will be completely accurate. Even though I try to provide accurate nutritional information to the best of my ability, these figures should still be considered estimations.