Cheesecake For a Sweet New Year

Even to the seasoned eater approaching new cuisines with an open mind, it can still be difficult to fully embrace something that falls well outside of established norms. Far beyond unexpected flavor combinations or uncommon ingredients, raw “uncooking” essentially turns the entire concept of hot food preparation on its head. Largely due to a lack of exposure, the concept remains abstract at best for most of the world, which I’m quickly learning is a real shame.

Working with the incredibly talented Gena Hamshaw on her upcoming cookbook has open my eyes, radically changing the way I view raw foods in general. Rather than the crazy gourmet raw foods we so often see in fine restaurants, the heart and soul of raw edibles is more about ease and straight-forward ingredients that are manipulated as little as possible. Inspired by her revolutionary recipes, I couldn’t stop thinking in the raw when it came time to craft my annual Rosh Hashanah dessert.

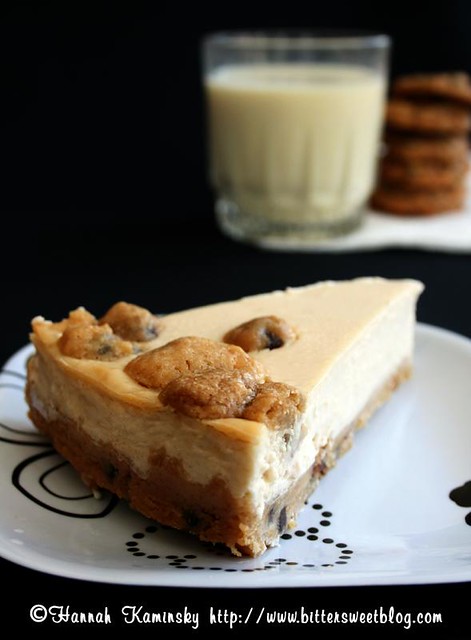
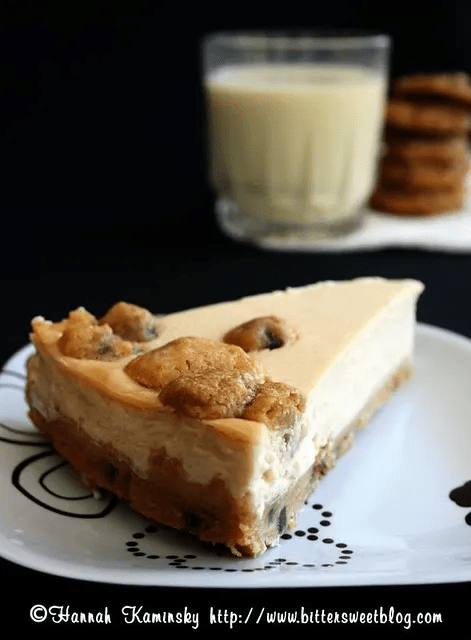
Apples and honey, the symbol of a sweet New Year, are almost painfully common flavors for the occasion, but a fresh approach to the presentation makes it taste new and exciting once more. Building the dessert on a crust made of dried apples and nuts, the apple flavor is intense, concentrated down into a small package, and packing a huge punch in even tiny wedges.

What can you use for vegan honey?

For the honey component, it may or may not pass the scrutiny of the raw police, but nothing can even touch the floral sweetness of Bee-Free Honee. I had the pleasure of reviewing it for Laika Magazine a million moons ago, or so it feels, and have been hooked ever since. Dark agave can substitute in a pinch, but nothing else comes close to the incredibly accurate flavor that this honee bears, without the input of a single bee. Besides, what could be better for the holiday than a “honey” that is in fact made out of apples? There’s something quite poetic about that synchronicity.

Is that a red onion on top?!

Long story short: No. That’s a case of “do as I say, not what I do.” Walking in the door of my Nana’s house with cheesecake in hand, everyone who laid eyes on the original presentation feared that I had topped my treat with slivers of raw red onion. Immediately scrapping that concept and grabbing the first green apple I found, thin half-moons were much more visually pleasing, and the different color helped erase that initial unsavory impression. As I’ve now learned, this is an opportunity to leave the fancy garnishes at home. The rich flavors will speak for themselves.

Yield: Makes 12 - 14 Servings

Raw Apples and Honey Cheesecake

Raw Apples and Honey Cheesecake

Building the dessert on a crust made of dried apples and nuts, the apple flavor is intense, concentrated down into a small package, and packing a huge punch in even tiny wedges.

Prep Time 30 minutes
Additional Time 3 hours
Total Time 3 hours 30 minutes

Ingredients

Apple-Pecan Crust:

  • 1 Cup Chopped Raw Pecans
  • 1 Cup Dried Apple Rings, Firmly Packed
  • 2 Large Medjool Dates, Pitted
  • 1/2 Teaspoon Ground Cinnamon
  • 1/4 Teaspoon Salt

Honey-Vanilla Bean Cheesecake Filling:

  • 1 Cup Raw Macadamia Nuts, Soaked for at least 6 Hours
  • 1 Cup Raw Cashew Pieces, Soaked for at least 6 Hours
  • 3 Ounces (6 Tablespoons) 100% Pure, Food-Grade Cocoa Butter, Melted
  • 1/2 Cup Vegan Honey or Light Agave Nectar
  • 1/4 Cup Lemon Juice
  • 1 Whole Vanilla Bean

To Garnish (Optional):

  • 1 Large Green Apple
  • 1 Tablespoon Lemon Juice

Instructions

  1. For the crust, start by tossing the pecans into your food processor with the s-blade installed. Pulse thoroughly until the nuts are mostly broken down into a fairly fine but coarse powder. Add in the dried apples, dates, cinnamon, and salt, and pulse again to incorporate. Continue processing until the fruits are blended in, no large chunks remain, and the mixture sticks together when pressed.
  2. Transfer to a 9-inch round springform pan and use your hands to press it firmly and evenly across the bottom. If it proves too sticky to easily handle, lightly moisten your hands before proceeding, or use the bottom of a flat measuring cup to help achieve a smoother surface. Stash the pan in the fridge while you move on to the filling.
  3. Thoroughly drain the macadamias and cashews before placing them in a high-speed blender. Add in the melted cocoa butter, vegan honey, and lemon juice. Because I’m lazy, I tend to just chop up my vanilla beans into inch-long pieces and add the whole pods in as well. You can always pull them out and save the spend pod for another use, such as vanilla sugar.
  4. Turn on the blender on low to start chopping up the nuts, and slowly increase the speed until you’ve reached the highest setting. Thoroughly puree, pausing to scrape down the sides of the canister as needed, until completely silky-smooth. This could take as long as 5 – 10 minutes depending on your machine, so be patient.
  5. Pour the resulting filling over your prepared crust, tapping it gently on the counter to knock out any air bubbles. Smooth over the top with your spatula before returning the whole assemblage to the fridge. Chill thoroughly, for at least 3 hours before serving, for the cheesecake to fully set to a slicable consistency.
  6. If desired, cut in half, core, and thinly slice a green apple and toss with lemon juice to prevent browning. Arrange the slices artfully across the top right before serving. Slice into thin wedges with a sharp, and keep chilled for the best texture and flavor.

Recommended Products

Please note that some of the links above are affiliate links, and at no additional cost to you, I will earn a commission if you decide to make a purchase after clicking through the link. I have experience with all of these companies and I recommend them because they are helpful and useful, not because of the small commissions I make if you decide to buy something through my links.

Nutrition Information:

Yield:

14

Serving Size:

1

Amount Per Serving: Calories: 252Total Fat: 18gSaturated Fat: 3gTrans Fat: 0gUnsaturated Fat: 14gCholesterol: 0mgSodium: 47mgCarbohydrates: 25gFiber: 3gSugar: 19gProtein: 3g

All nutritional information presented within this site are intended for informational purposes only. I am not a certified nutritionist and any nutritional information on BitterSweetBlog.com should only be used as a general guideline. This information is provided as a courtesy and there is no guarantee that the information will be completely accurate. Even though I try to provide accurate nutritional information to the best of my ability, these figures should still be considered estimations.


Messing with Perfection

If it’s not broken, don’t fix it.

Being so wholly resistant to change, it would seem completely the antithesis of my typical modus operandi to keep on tinkering and messing with a recipe so beloved as the chocolate chip cookie, and yet, I can’t keep my paws off of it.

Though friends and family would have me on criminal charges if I ever presented them with something other than my Bakery-Style Chocolate Chip Cookies, I still feel as though there’s so much more that this humble morsel can offer. But what on earth could be done to improve upon alleged perfection?

Well, how about adding another “perfect” dessert into the mix?

Like a cookie monster’s dream come true, the base of this cheesecake is not the same old graham cracker mush, but straight chocolate chip cookie dough, baked to crisp perfection on the bottom, yet still soft and chewy throughout. If there was ever a way to make something as untouchable as the classic CCC’s even better, I believe it would have to be this.

Yield: Makes 12 to 16 Servings

Chocolate Chip Cookie Dough Cheesecake

Chocolate Chip Cookie Dough Cheesecake

Like a cookie monster’s dream come true, the base of this cheesecake is not the same old graham cracker mush, but straight chocolate chip cookie dough, baked to crisp perfection on the bottom, yet still soft and chewy throughout.

Prep Time 30 minutes
Cook Time 1 hour
Additional Time 3 hours
Total Time 4 hours 30 minutes

Ingredients

Cookie Dough Crust and Topping:

  • 1/4 Cup Vegan Butter
  • 1/2 Cup Granulated Sugar
  • 1/2 Cup Dark Brown Sugar, Firmly Packed
  • 1 1/2 Cup All Purpose Flour
  • 1/4 Teaspoon Baking Powder
  • 1/4 Teaspoon Salt
  • 1/2 Teaspoon Vanilla Extract
  • 4 - 6 Tablespoons Plain Non-Dairy Milk
  • 1/3 Cup Mini Chocolate Chips, or Finely Chopped Semi-Sweet Chocolate

Cheesecake Filling:

  • 1 (12-Ounce) Package Extra-Firm Silken Tofu
  • 2 (8-Ounce) Packages Vegan Cream Cheese
  • 2/3 Cup Granulated Sugar
  • 2 Teaspoon Vanilla Extract
  • 1/8 Teaspoon Salt

Instructions

  1. Preheat your oven to 350 degrees and lightly grease and flour a 9-inch round springform pan.
  2. In your stand mixer, beat the vegan butter briefly to soften before adding in both sugars. Cream together thoroughly, until smooth, and then add in the flour, baking powder, and salt all at once. Mix on low speed to begin incorporating the dry goods, add in the vanilla, and slowly drizzle in the milk, one tablespoon at a time, just until the dough comes together. Continue mixing until homogeneous, if necessary, and finally work in the chocolate chips, beating just until the pieces are evenly distributed throughout. Measure out 1/2 cup of the dough and set this aside for the topping.
  3. Press the remainder of the dough into the bottom of your prepared springform pan, smoothing it out into an even layer, and bake for 15-18 minutes, until golden brown all over, and set aside to cool. Lower the oven to 325 degrees.
  4. Moving on to the filling, drain the tofu of any excess water and blend it in your food processor or blender until completely smooth. Add in the cream cheese and blend once more. Scrape down the sides and blend again, ensuring that no lumps remain. Incorporate the sugar, vanilla, and salt. Scrape down the sides once more, checking for any pockets of unincorporated ingredients. Blend thoroughly to create a homogeneous mixture, and pour it on top of your cookie crust. Tap the whole pan on the counter lightly, to even it out and eliminate any air bubbles. Smooth the top with your spatula.
  5. Take out your reserved cookie dough, and roll it into small, marble-sized balls. Drop the dough balls randomly around the edges of the cheesecake before transferring it to the oven. Bake for approximately 45 minutes, until the sides begin to pull away from the pan and the center still appears to be rather wobbly when tapped. Be careful not to over-bake, as it will become firmer as it cools.
  6. Let the cheesecake cool completely before moving it into the refrigerator, where I suggest you let it chill for at least 12 to 24 hours before serving. This will allow the flavors to fully develop and intensify. If you can’t wait, give it a minimum of 3 hours to reach the proper temperature.

Recommended Products

Please note that some of the links above are affiliate links, and at no additional cost to you, I will earn a commission if you decide to make a purchase after clicking through the link. I have experience with all of these companies and I recommend them because they are helpful and useful, not because of the small commissions I make if you decide to buy something through my links.

Nutrition Information:

Yield:

16

Serving Size:

1

Amount Per Serving: Calories: 191Total Fat: 6gSaturated Fat: 2gTrans Fat: 1gUnsaturated Fat: 4gCholesterol: 0mgSodium: 64mgCarbohydrates: 34gFiber: 1gSugar: 24gProtein: 2g

All nutritional information presented within this site are intended for informational purposes only. I am not a certified nutritionist and any nutritional information on BitterSweetBlog.com should only be used as a general guideline. This information is provided as a courtesy and there is no guarantee that the information will be completely accurate. Even though I try to provide accurate nutritional information to the best of my ability, these figures should still be considered estimations.


Flourless and Fancy-Free

Never has it been accused of being a particularly fun occasion, but Passover can be an especially loathsome event for those who already must seek alternatives to mainstream fare. After one dreadful and nearly deadly week of subsisting on nothing but cardboard incarnate matzo smothered in sticky peanut butter many years ago, the ritual simply became too much for me to bear.

Yes, I’m a bad Jew, and I don’t observe Passover beyond the initial sedar. I now know that there are plenty of good eats to be had for Jewish vegans during this period of repentance… But not so much here. That isn’t to say that it’s a meaningless date to me in the least, and I do at least try not to tempt my slightly more pious family with my typical barrage of wheat-filled baked goods. At the end of the day, it’s simply a matter of favoring health, rather than adhering to a tradition that doesn’t quite resonate with me, and to each their own.

To that end, it was a matter of luck that one of the most recent recipes that ended up being cut from Vegan Desserts fits perfectly into the requirements for this wheat-free holiday;  The fact that it happens to be delicious for the remaining 51 weeks of the year is an added bonus.  Combining simple but pleasing flavors, easy to whip up, and the perfect size to feed a small dinner party, the recipe could also be doubled to accommodate a larger crowd… Or so that you can freeze leftover mini cheesecakes to snack on throughout the week.

Being a light drinker myself, I could have easily gone years without even knowing about the astringent citrus liqueur known as limoncello, had it not been for a friend’s request to make something with it. After doing a bit of research, through both reading and tasting, it turned out to be a whole lot like concentrated lemon juice with an extra kick. To allow this spirit to shine, a blank canvas like cheesecake seemed to be an excellent fit, and by making it into small bites, you can enjoy a little burst of flavor whenever you please.

Yield: Makes 12 Cheesecake Bites

Limoncello Cheesecake Bites

Limoncello Cheesecake Bites

Consider these mini cheesecakes little bites of lemony sunshine. They're flourless and gluten-free so everyone can enjoy!

Ingredients

Almond Crust:

  • 1/2 Cup Almond Meal
  • 1 Tablespoon Granulated Sugar
  • 2 Tablespoons Tapioca Flour
  • 2 Tablespoons Vegan Butter or Coconut Oil, Melted

Limoncello Filling:

  • 8 Ounces (1 Cup) Vegan Cream Cheese
  • 2 Tablespoons Cornstarch [Not Appropriate for Passover] or Potato Starch
  • 1/4 Cup Granulated Sugar
  • 1/3 Cup Limoncello
  • 1/4 Teaspoon Vanilla Extract

Instructions

  1. Preheat your oven to 350 and lightly grease and flour 12 mini muffin cups.
  2. For the crust, simply combine all of the ingredients to form a moist but crumbly mixture, and firmly press 1 tablespoon of this into the bottom of each mini muffin cup. Stash the pan in your freezer while you assemble the filling.
  3. Beat together the cream cheese, corn starch, and sugar in your stand mixer on low speed, or with a wide spatula, until smooth. Pour in the limoncello and vanilla, mixing until thoroughly combined.
  4. Distribute the filling between all of your crust-lined cupcakes, and bake for 15 – 20 minutes. Like a standard cheesecake, they will seem very loose when fresh out of the oven, but continue to firm up as they cool, so be careful not to over bake them. The cheesecake bites will puff significantly in the oven, but will fall as they cool.
  5. After chilling in the fridge for at least an hour, slip a thin paring knife down the sides of each cheesecake bite and use it as a lever to remove them. Serve chilled or at room temperature.

Recommended Products

Please note that some of the links above are affiliate links, and at no additional cost to you, I will earn a commission if you decide to make a purchase after clicking through the link. I have experience with all of these companies and I recommend them because they are helpful and useful, not because of the small commissions I make if you decide to buy something through my links.

Nutrition Information:

Yield:

12

Serving Size:

1

Amount Per Serving: Calories: 178Total Fat: 12gSaturated Fat: 5gTrans Fat: 0gUnsaturated Fat: 6gCholesterol: 20mgSodium: 62mgCarbohydrates: 14gFiber: 1gSugar: 9gProtein: 2g

All nutritional information presented within this site are intended for informational purposes only. I am not a certified nutritionist and any nutritional information on BitterSweetBlog.com should only be used as a general guideline. This information is provided as a courtesy and there is no guarantee that the information will be completely accurate. Even though I try to provide accurate nutritional information to the best of my ability, these figures should still be considered estimations.


Sweet and Sour

What’s The Best Way To Use Kefir?

After quickly discovering that the plain Coconut Kefir wasn’t something I would be quick to drink on it’s own, I wasted no time in brainstorming other uses for it. Thinking along the “buttermilk” route first, I immediately thought of that classic breakfast staple, buttermilk pancakes.

And as one could imagine, they were perfectly tasty pancakes. Exciting, innovative, or creative…? Not so much. Such a simple interpretation of this ingredient just wouldn’t be enough to do it justice in my eyes.

What Does Kefir Taste Like, Anyway?

Going back to the drawing board, it was a challenge to brainstorm some dessert that would still highlight the unique flavor of the kefir.

Without sweetener, it can be quite sour, but when properly balanced, it’s tart, tangy, bright, and even refreshing.

Quickly realizing that any baked good would only detract from its bright tartness, the oven was out of the picture. Dreaming up a creamy, tangy concoction, in no time at all, I had exactly what I had been craving all along: Cheesecake.

Not just any cheesecake, of course.

Unlike most vegan cheesecakes, this one is easier, healthier, and just plain tastier. It’s…

  • Soy-free (no tofu!)
  • More affordable (skip those expensive dairy-free cream cheeses)
  • Low-sugar (lightly sweetened to bring out delicate nuances of the kefir)
  • Sophisticated but simple enough for any occasion

You could certainly dress it up with a vibrant fresh fruit sauce or decadent drizzle of ganache, but I’m happy enough with a light border of whipped coconut creme and some toasted coconut flakes on top.

Can’t Find Coconut Kefir?

A great substitute for coconut kefir is vegan coconut yogurt (plain, unsweetened) thinned with a little bit of water. It depends on the thickness of you brand; you want to aim for the viscosity of pancake batter.

Like all no-bake cheesecakes, the texture is perhaps not what you would first expect from such a treat, but I find that it’s instead much lighter and more refreshing than the traditional version.

Yield: Makes 10 - 12 Servings

No-Bake Coconut Kefir Cheesecake

No-Bake Coconut Kefir Cheesecake

Tart, tangy, light, and refreshing, this no-bake cheesecake is packed with healthy probiotics thanks to whole coconut kefit and yogurt.

Prep Time 10 minutes
Cook Time 10 minutes
Additional Time 3 hours
Total Time 3 hours 20 minutes

Ingredients

Cookie Crust:

  • 10 Ounces Vegan Wafer Cookies*, to Make About 2 Cup Crumbs
  • 6 Tablespoons Vegan Butter or Coconut Oil, Melted
  • 1/4 Teaspoon Ground Cinnamon (Optional)

Kefir Cheesecake Filling:

  • 3/4 Cup Vanilla Coconut Milk Yogurt
  • 2 Cups Plain, Unsweetened Coconut Kefir
  • 1 Cup Full-Fat Coconut Milk
  • 1 Tablespoon Agar Agar Powder
  • 3/4 Cup Granulated Sugar
  • 1/4 Cup Arrowroot
  • 1 Tablespoon Vanilla Extract

Instructions

  1. First, finely crush your cookies so that they’re about the texture of almond meal, and mixing in the cinnamon if using. I find that a food processor helps to get a better texture, but you can also smash them in a sealed plastic bag with a rolling pin. Transfer the crumbs to a medium bowl, and stir in the melted vegan butter or coconut oil, making sure that you moisten all of the crumbs and leave no dry patches in the mixture.
  2. Lightly grease a 10-inch round springform pan, and press the crumb mixture into the bottom, smoothing it out evenly with the bottom of a measuring cup or glass. Place it in the refrigerator for the time being.
  3. In a medium saucepan, combine the coconut yogurt, coconut kefir, and coconut milk. Separately, mix together the agar, sugar, and arrowroot in a small dish, being careful to evenly distribute all of the dry ingredients. This will help to prevent lumps from forming. Slowly sprinkle this dry mixture into the saucepan while vigorously whisking, until you’re certain that it’s all been incorporated, and there are no clumps lurking on the bottom of the pan, too.
  4. Turn on the stove to medium heat, and whisk occasionally (but don’t walk away!) as it comes up to temperature, until bubbles break on the surface and it feels significantly thickened. Turn off the heat, whisk in the vanilla, and retrieve your chilled crust. Pour the cooked filling into your springform pan, and tap it a few times on the counter to release any air bubbles and to even out the top.
  5. Let cool COMPLETELY at room temperature before moving the cheesecake into your fridge to chill; Hastening this process will weaken the gel, and lead to weeping (from the filling, but you may feel like it too.) Chill for at least 3 hours before serving.

Notes

*I used ginger cookies, but pretty much any wafer cookies (or even sandwich cookies) will work.

Recommended Products

Please note that some of the links above are affiliate links, and at no additional cost to you, I will earn a commission if you decide to make a purchase after clicking through the link. I have experience with all of these companies and I recommend them because they are helpful and useful, not because of the small commissions I make if you decide to buy something through my links.

Nutrition Information:

Yield:

12

Serving Size:

1

Amount Per Serving: Calories: 330Total Fat: 23gSaturated Fat: 15gTrans Fat: 1gUnsaturated Fat: 7gCholesterol: 2mgSodium: 112mgCarbohydrates: 29gFiber: 3gSugar: 20gProtein: 4g

All nutritional information presented within this site are intended for informational purposes only. I am not a certified nutritionist and any nutritional information on BitterSweetBlog.com should only be used as a general guideline. This information is provided as a courtesy and there is no guarantee that the information will be completely accurate. Even though I try to provide accurate nutritional information to the best of my ability, these figures should still be considered estimations.