Dal Puri Roti with Tamarind Sauce
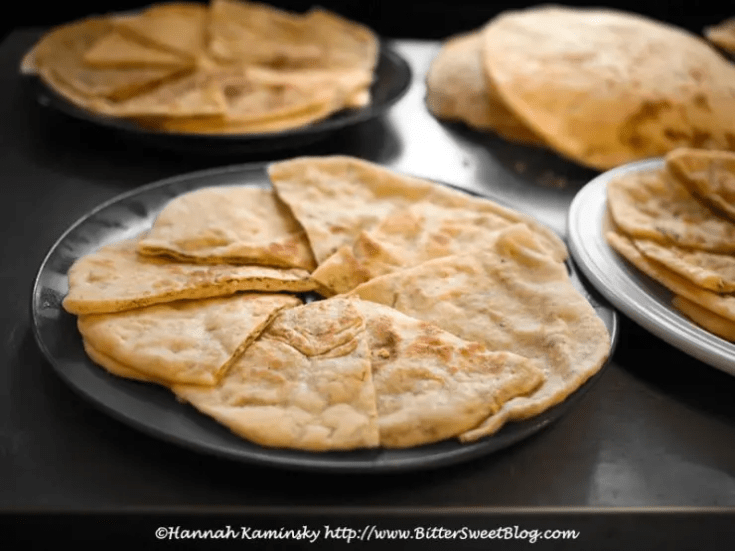
"I do not exaggerate when I say this is one of my favorite breads in the world! It’s obviously of Indian origin, but this version is a Trinidad specialty. It works well on it’s own, but if you roll it out thin enough you can then stuff it with various curries and roll it up like a burrito for some Trini heaven.
Culantro is a related to cilantro and similar, yet different enough to seek out. If you have Latin markets in your area, you may be able to find it. It’s also called chado beni in Trinidad.
A tawa is a cast-iron or stainless steel griddle that fits on top of your stove burner (gas or electric.) These are inexpensive, usually made in India, and easily found at Indian or Caribbean markets or online.”
By Chef Philip Gelb of Sound & Savor
Ingredients
Tamarind Sauce:
- 1 Tablespoon Coconut Oil
- 4 Green Onions, Diced
- 2 Cloves Garlic, Minced
- 2 Tablespoons Fresh Cilantro
- 1/2 Teaspoon Salt
- 1/2 Teaspoon African Bird Pepper or Cayenne Pepper
- 1/4 Cup Palm Sugar or Coconut Sugar
- 1 Cup Water
- 1/3 Cup Tamarind Concentrate
Dal Puri Roti Filling:
- 1 14-Ounce Cans Garbanzo Beans
- 1 Habanero Pepper, Seeded and Minced
- 3 Cloves Garlic, Minced
- 1 Teaspoon Salt
- 1 Teaspoon Ground Cumin
- 1 Bunch Fresh Cilantro
- 1 Bunch Fresh Culantro
Roti Dough:
- 3 Cups All-Purpose Flour
- 2 Teaspoons Baking Powder
- 1/2 Teaspoon Active Dry Yeast
- 1 Teaspoon Salt
- About 1 1/2 Cups Water
- Coconut Oil, to Cook
Instructions
- Prepare the tamarind sauce first. In a skillet, add the coconut oil, green onion, and garlic. Sauté for three minutes, until aromatic. Transfer to a mortar and pestle and pulverize along with the cilantro. Add the rest of the ingredients and mix well. Taste and adjust seasonings as desired.
- Place all of the ingredients for the filling into a food processor and grind into a rough mash. Set aside.
- In a large bowl, whisk together the flour, baking powder, yeast, and salt. Add water and mix together with a spoon until the dough becomes too thick to stir. Use your hands to finish combining the ingredients. Use just enough water to form a ball and knead gently for a few minutes, until smooth. Cover dough with a clean kitchen towel and let rest for at least 1 hour.
- Divide the dough into 10 equal pieces. Form each piece into a ball and then roll into a small circle. Add about 1/10th of the garbanzo mixture and wrap the dough around it, much like you would for a dumpling. Pinch the dough closed, cover once more, and let rest for another hour.
- Place a griddle or large skillet over medium heat and brush liberally with coconut oil. Roll each ball into a flat, thin circle. Place the dough on the skillet and brush the top with more coconut oil. Cook for 1 minute before flipping. Cook for another minute, flip again, and cook for 1 minute longer. Repeat with all the remaining dough.
Recommended Products
Please note that some of the links above are affiliate links, and at no additional cost to you, I will earn a commission if you decide to make a purchase after clicking through the link. I have experience with all of these companies and I recommend them because they are helpful and useful, not because of the small commissions I make if you decide to buy something through my links.


Nutrition Information:
Yield:
10Serving Size:
1Amount Per Serving: Calories: 265Total Fat: 4gSaturated Fat: 2gTrans Fat: 0gUnsaturated Fat: 1gCholesterol: 0mgSodium: 637mgCarbohydrates: 49gFiber: 5gSugar: 9gProtein: 8g
All nutritional information presented within this site are intended for informational purposes only. I am not a certified nutritionist and any nutritional information on BitterSweetBlog.com should only be used as a general guideline. This information is provided as a courtesy and there is no guarantee that the information will be completely accurate. Even though I try to provide accurate nutritional information to the best of my ability, these figures should still be considered estimations.